Finally! I had the opportunity to head up to my FLGS and spend some therapeutic time playing a game of 40k. Work has kept me very busy and often on the road, so this is the first time I'd had a chance to play since the Feast of Blades qualifier in my area.
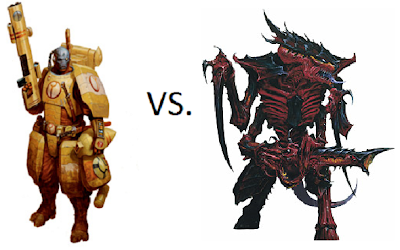
My opponent was the player who went to Feast of Blades in my stead. He brought Tau to the Feast invitational (triple Riptides), but today he played me with his Tyranids. I hadn't really played Tyranids, ever, so I was excited to see what they could do. He was sick of playing 1850, so we agreed on 2000 points and beefed up our standard lists a little bit.
The Armies
Tyranids
Being unfamiliar with his codex, I can only give a rough description of the list he took. I also might get the gaunt numbers incorrect too.
- Warlord - Hive Tyrant w/ wings & the 6-shot weapon.
- Trygon Prime
- Trygon
- Tervigon w/ the 18" large blast weapon
- Tervigon w/ the 18" large blast weapon
- 2 Hive Guard
- 2 Biovores
- 10 Termagaunts
- 23 Hormagaunts
- 23 Hormagaunts
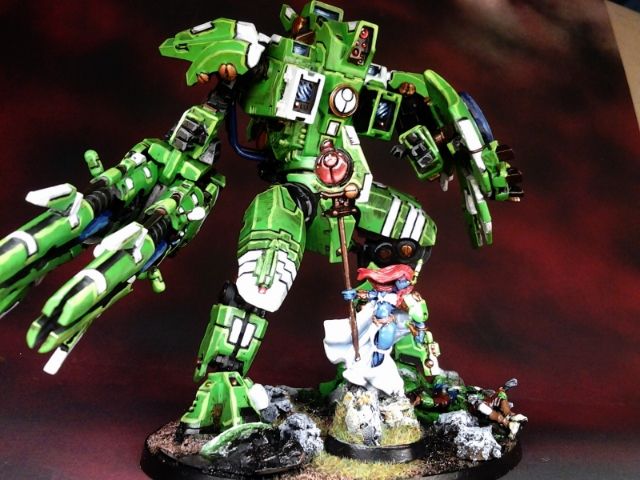
Tau Empire
My own list was my Feast of Blades list, tweaked and beefed up to hit 2000 points. Mostly I just added Firewarriors and a Fireblade. For brevity, I am appreviating the support systems
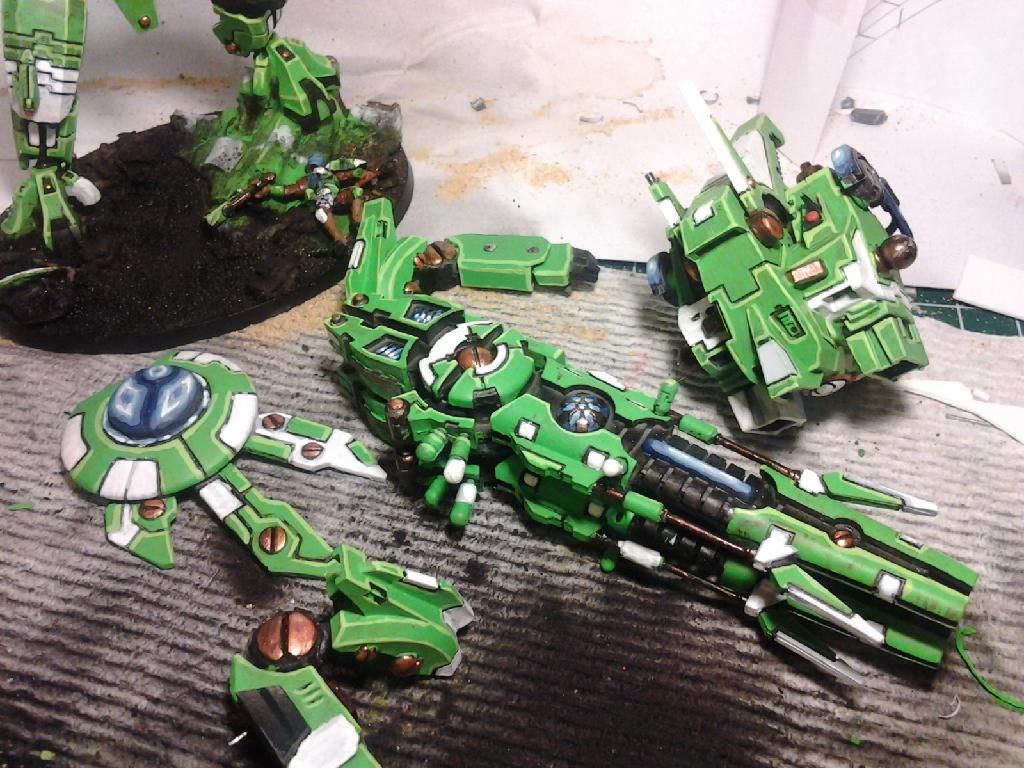
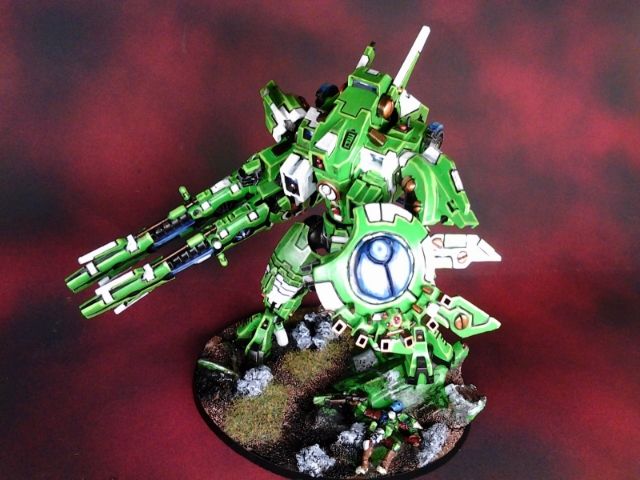
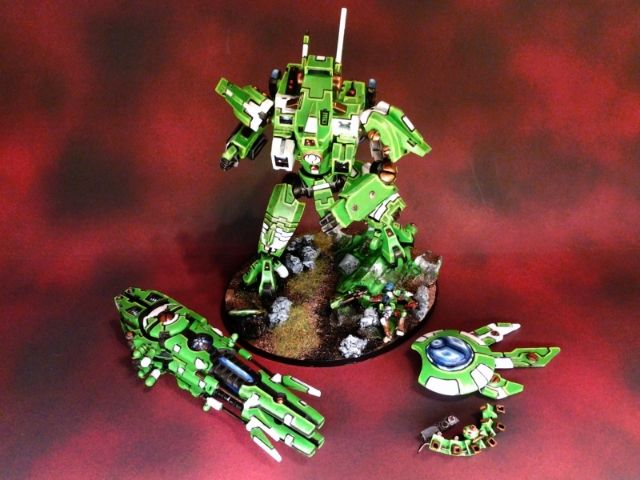
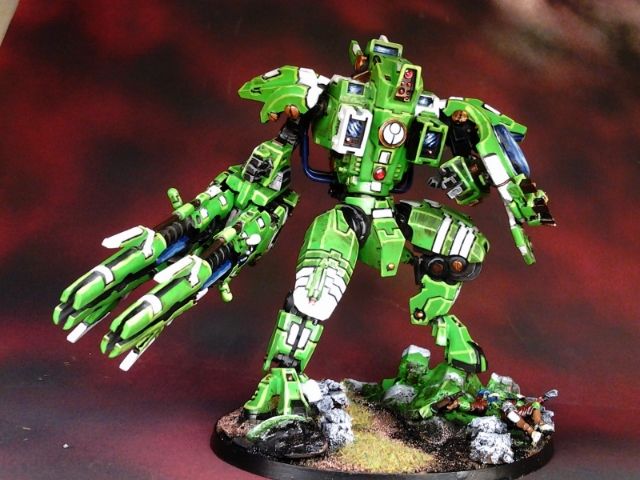
- Warlord - Shas'O Burning Eye-D w/ OG, PEN, x1 Shield Drone
- Cadre Fireblade
- XV8 Team: Raven w/ VRT, x2 Burning Eye-D w/ ATS
- XV8 Team: Shas'Vre Deathrain w/ TL, x2 Deathrain w/ TL, x6 Marker Drones
- Stealth Team: Shas'Vre w/ CDS, x5 Stealth Suits w/ CDS (all burst cannons)
- 2 Piranhas w/ Fusion Blasters
- 6 Firewarriors w/ Pulse Rifles in Devilfish (DPod, SMS)
- 6 Firewarriors w/ Pulse Carbines in Devilfish (DPod, SMS)
- 8 Firewarriors w/ Pulse Rifles
- 12 Firewarriors w/ Pulse Rifles
- Skyray (Dpod, SMS)
- Hammerhead w/ Railgun (Dpod, SMS)
- Longstrike Hammerhead w/ Railgun (Dpod, SMS)
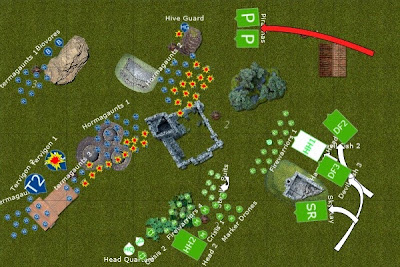
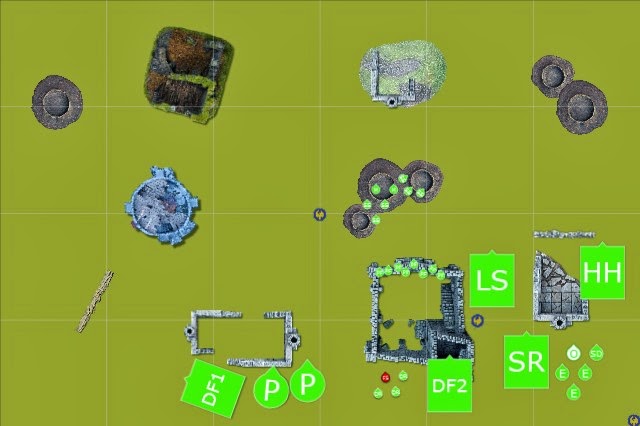
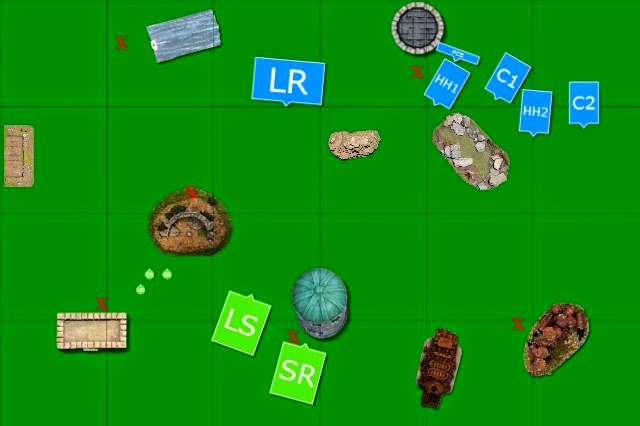
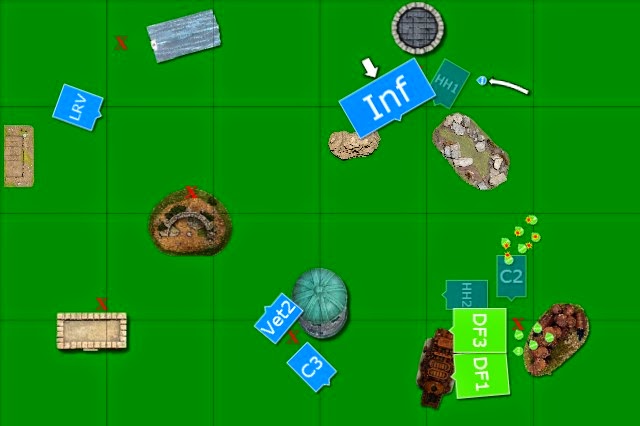
The Setup
1st Turn: Tyranids (Tau failed to seize initiative)
Warlord Traits: Both useless. Mine allowed all units to get back up after going to ground. His was like Synapse only not as good.
Psychic Powers: Both his Tervigons failed to get Iron Arm. Instead, they got Endurance. His Hive Tyrant got Warp Speed and Iron Arm.
Scenario: The Scouring
Deployment: Diagonal (Vanguard Strike?)
Night Fight: None
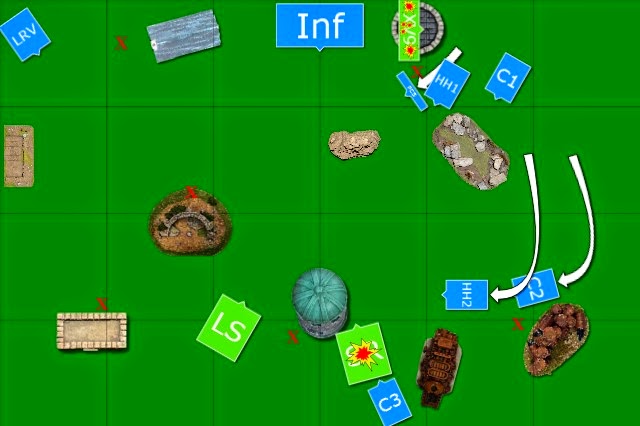
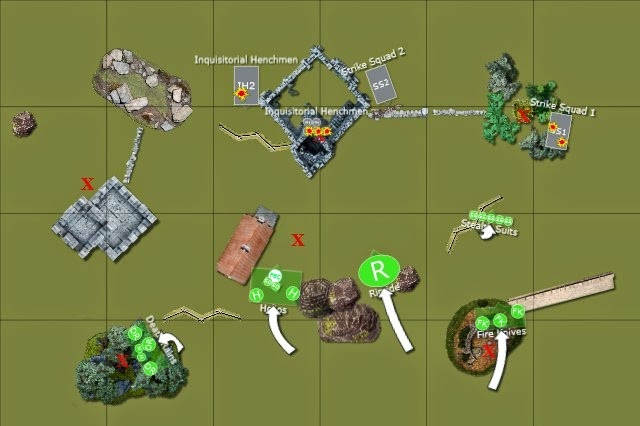
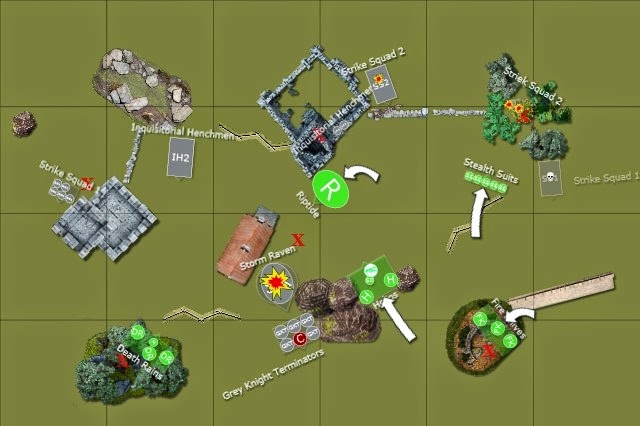
Mostly mid-to-small sized terrain pieces with a large LOS blocking piece in the center. A few area terrain pieces as well. We chose sides and deployed without knowing the values of each objective. I tried to place my objectives in open areas and towards the center, to encourage units to be vulnerable when claiming them.
Deployment
I won the roll-off but elected to deploy second.
Infiltrate: my stealth suits deployed an inch or so forwards of my lines
Outflank: none
Deep Strike: his Flyrant and Trygons
Reserves: none
Scout: none
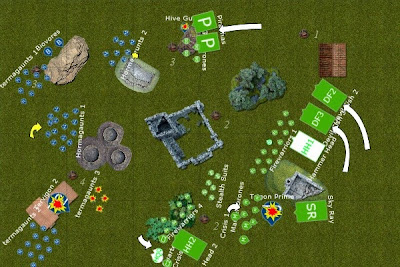
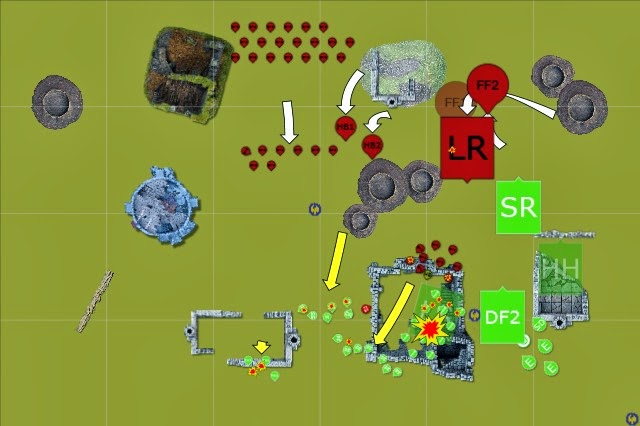
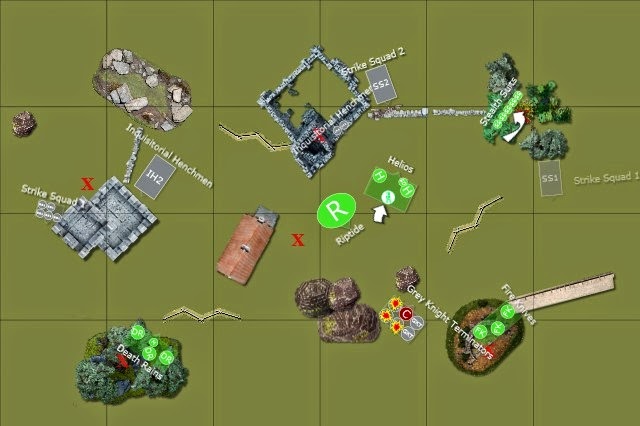
Turn 1
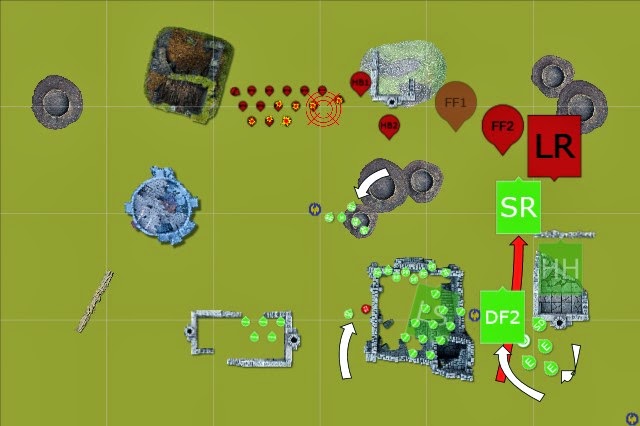
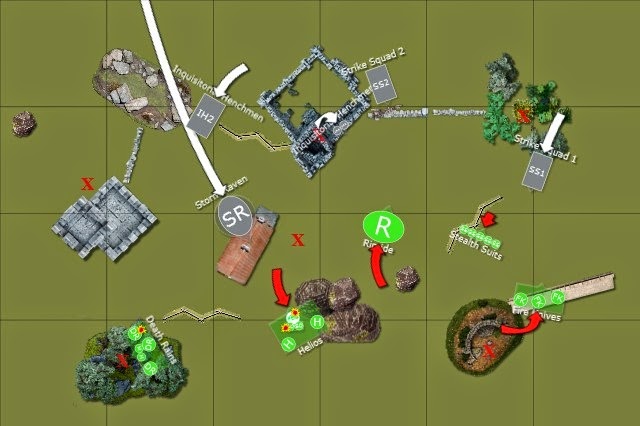
Tyranids Turn 1
His two Tervigons spawned first. #2 spawned 13 but choked in the process, hurray! #1 did not choke and only spawned 8. He then cast Endurance on his Hormagaunt Brood #1. I am not sure what the second Tervigon cast, it didn't come into play.
Then he moved everything forward straight at me, except for his shooting units and his Termagaunts holding the backfield objective.
He ran his gaunts and then fired the Hive Guard at my Stealth Suits. He landed only one wound and my stealth suit passed his armour save. Then he fired his Biovore barrage at my 8-man Firewarrior team. It scattered onto the Marker/Deathrain unit and then hit that spot again. He caused a few wounds, but I saved most since the nearest model to the center of the blast was an XV-8. My Shas'vre took a single wound.
Nothing was in assault range, so his turn was over.
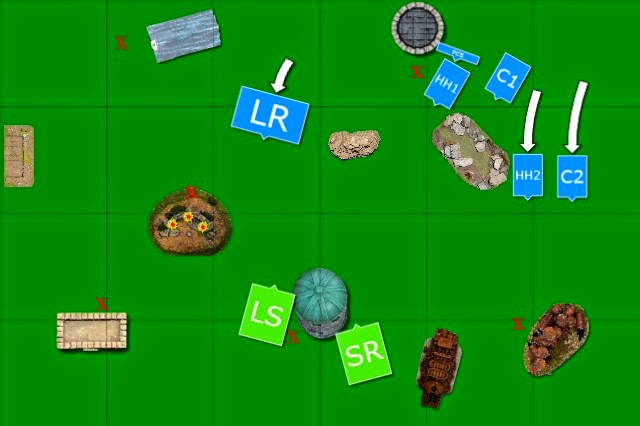
Tau Turn 1
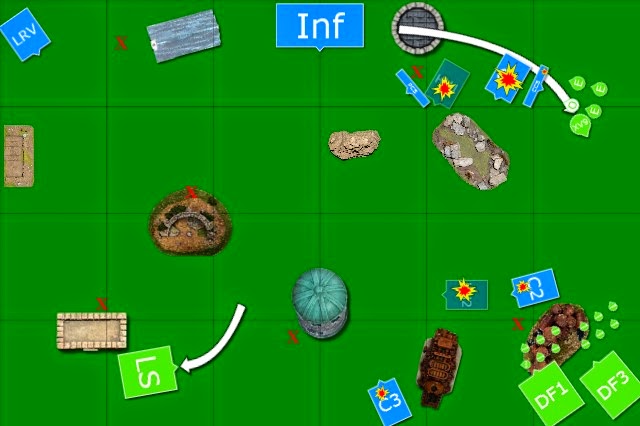
I moved my piranhas just outside of 24" range of his hive guard, moved up all my vehicles, and shuffled my Stealth Suits sideways a bit.
I started off shooting with my Marker/Deathrain unit. The Deathrains fired on the Tervigon, but only wounded once, and he made his armour save. The marker drones landed a couple markerlights on the nearest Hormagaunt brood. My 8-man Firewarrior team, Skyray, and Hammerhead all fired on the hormagaunts, but FNP saves kept his losses down to only 8.
I then took a pot-shot with my Devilfish 2's SMS at the Hive Guard hiding out of sight. I managed 3 wounds, and he failed all of them! Since that went so well, I decided to boost my Piranhas up to 12" away from them. Then Longstrike, Devilfish 1, the Fireblade and his 12 Firewarriors all fired on the second Hormagaunt brood. I forget exactly how many died, but it was more than half.
The Stealth suits didn't have LOS to many units, so they targeted the small Termagaunt squad, killing 4.
Finally, I finished my shooting with my favorite unit: the Burning Eye assassin team. At long range they had 6 tau plasma shots, twin-linked, re-rolling to wound, and ignoring cover. I rolled very well and landed 6 wounds, killing Tervigon #1 outright!
My shooting was done, and his two Hormagaunt broods were both out of Synapse, so they failed their leadership check and fled. The Hive Guard passed leadership.
Fun Fact: My assassin team is feared in my local group, and they refer to it as "That unit."
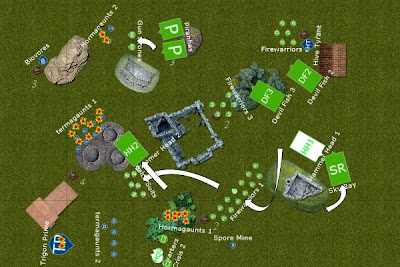
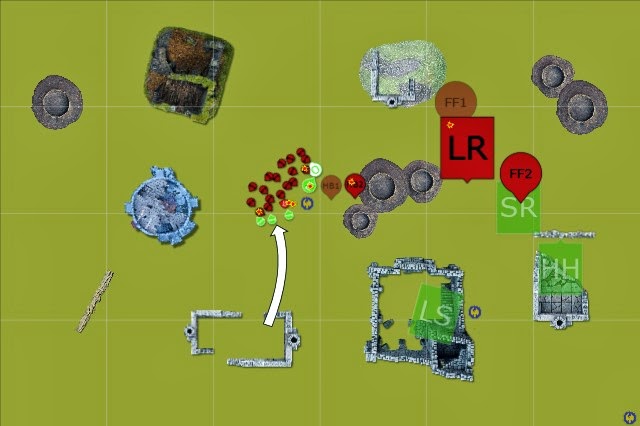
Turn 2
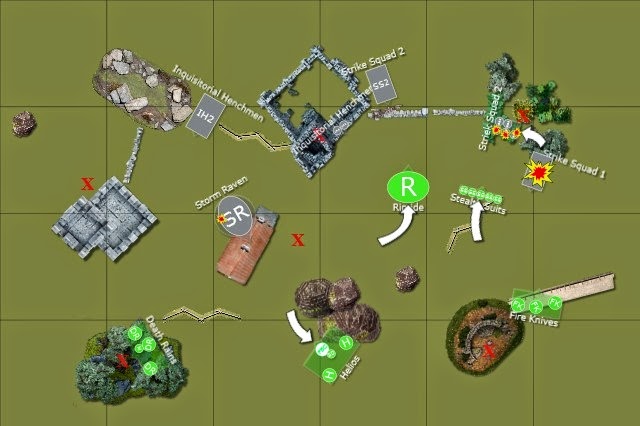
Tyranid Turn 2
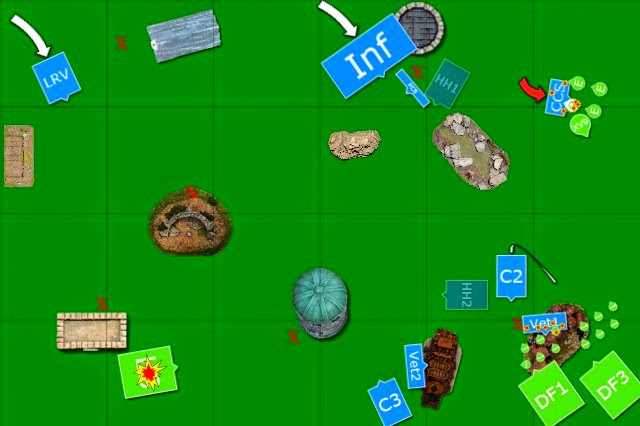
He rolled for reserves but only the Trygon Prime would be coming on. His Tervigon cast Endurance on his Hormagaunts again.
The Hormagaunts rallied near the second Tervigon but the second brood kept running. The Termagaunts moved forward with the Tervigon and his Trygon Prime popped up right in front of my Skyray.
He fired his Biovores at my firewarriors again but mostly missed. He did kill one Firewarrior though. His remaining Hive Guard fired at my approaching Piranhas and destroyed the Fusion Blaster on one of them. His Tervigon tried to fire the large 18" blast weapon but it scattered away from my assassin team. Lastly, he targeted my Marker/Deathrain unit with his Trygon Prime. He inflicted several wounds and I lost a marker drone, a crisis suit, and my last 'Ui was wounded. Not overly impressive, but if just one other MC had come on that turn, I'd have had my hands full.
Tau Turn 2
I moved my Piranhas right up to his Hive Guard and disembarked my gun drones. I realize now that I should not have been allowed to do that since they moved more than 6" to do it. I guess I could have boosted the full 18" last turn and avoided the issue. Either way, we both forgot.
My other vehicles moved up as well, getting ready to grab some objectives, and my assassin team jumped forward into Rapid Fire range of the Tervigon. My Marker/Deathrain team moved up to the Trygon, ready to block his movement if he survived this turn's shooting.
The piranha gun drones finished off the last wound on the Hive Guard.
My Skyray and Marker drones lit up the Trygon, but only landed a couple hits. I used them to boost the BS of my large Firewarrior team. Longstrike, Fireblade, Deathrains, 12 Firewarriors, 6 Stealth Suits all fired at the Trygon and killed it.
My 7 Firewarriors killed off the small Termagaunt squad. My assassin team inflicted 9 wounds on the Tervogon, killing him immediately, then jumped back to my lines. My stealth suits and gun drones and marker/deathrains all repositioned into a cohesive line with their thrust move.
Some guys came over to see how the game was going. So far I'd only lost a firewarrior, a marker drone, and a crisis suit and my assassin team had killed a Tervigon each turn.
To him: "Oh, that unit. I feel your pain dude."
To me: "You mean to tell me that this is your dead pile? How do you sleep at night???"
Turn 3
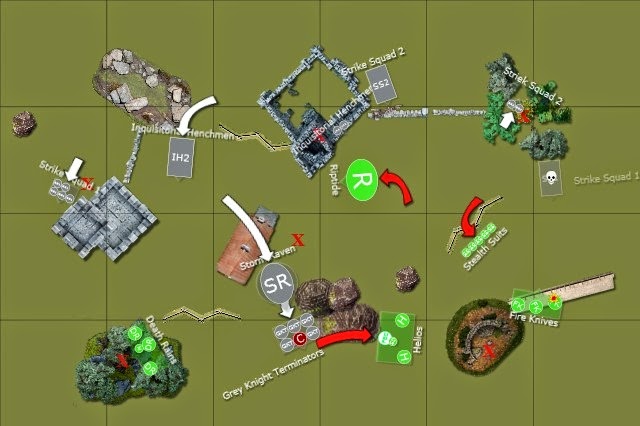
Tyranid Turn 3
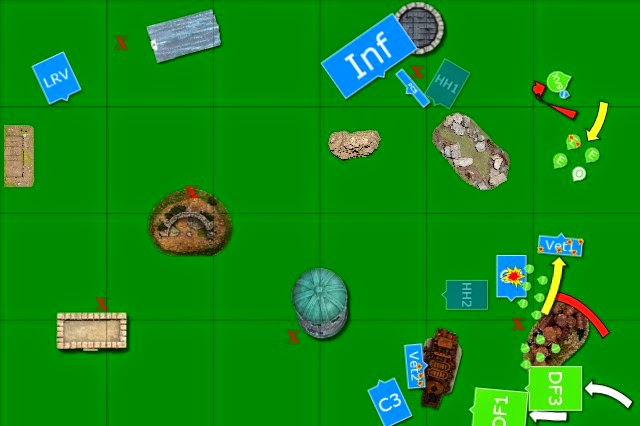
Both of his other MC's came on this turn, and he cast Iron Arm on the Trygon (excuse the picture error, this was a regular Trygon, not a prime). The other brood of Hormagaunts failed to rally and continued their flight.
The Hive Tyrant landed right behind Longstrike but his Trygon Prime (trying to come behind the Skyray) scattered off the board and I was able to put him far away in a corner ("Bad Trygon. Now sit there and think about what you did"). His other units all moved up except the Biovores.
His Hive Tyrant fired on LongStrike, landing a Glance and a Pen. I failed both of my jink saves and the Pen hit destroyed Longstrike's Railgun.
The Biovores fired on the Firewarriors yet again, but it scattered so far it generated a spore mine.
Things were looking bleak for the Tyranids.
Tau Turn 3
I decided that he was at the breaking point, so I advanced. I moved up and claimed two objectives with my small firewarrior units, moved the Hammerhead up to block his Hormagaunts, claimed an objective with my Piranhas, and moved the gun drones up.
My gun drones had LOS on one Biovore and promptly shot it down. My Skyray targeted his Hive Tyrant, landed a ML hit, boosted its BS to 5, and unloaded. He failed 2 armour saves against the SMS, but passed 4 cover saves against my Seekers!!! I fired everything else that was in range, but he passed every single grounding test and armour save! Rediculous. My units out of range targeted the nearest gaunt broods, killing some here and there.
Turn 4
Tyranid Turn 4
His Hive Tyrant cast Iron Arm, but unfortunately only gained +1 strength and toughness. His fleeing gaunts passed their check and consolidated, poised to assault my poor gun drones.
He flew his tyrant up to contest the north objective, and stay out of range of my assassin unit. On the way he vector struck my Devilfish 2, immobilizing it. Everything else moved straight for me. The spore mine moved towards me, but only 1".
His Biovore moved to get away from the Gun Drones, and fired directly at my assassin team. The scatter killed a single marker drone. The Flyrant's shooting did nothing, since he'd dove and could only fire snap shots. The small group of termagaunts fired at my firewarriors but inflicted no wounds.
I had underestimated the speed of his Hormagaunts. They moved up and multi-assaulted my Marker/Deathrain team and my firewarriors. Sadly, the Stealth Suits were out of support range since I'd moved them to support the Hammerhead I thought was going to be assaulted. Overwatch fire killed 3 gaunts, then I struck first, killing 5. On his turn, even with only 7 left and no charge bonus, he landed ~9 wounds. I promptly failed 7 of them, lost the combat, and got run down. His other Hormagaunts charged my drones, losing a couple to overwatch fire. I lost two gun drones to his 3 remaining gaunts, and the two remaining fled back to their Piranha mommies ("Let us back in!"). He consolidated his 3 gaunts into cover on the edge of the large rock.
Tau Turn 4
That Hive Tyrant was getting on my nerves, so I figured I could probably take it down just by causing some grounding checks, even if my shooting needed 6's to wound.
I moved up my hammerhead, stealth suits, and gun drones. I also moved my large Firewarrrior team to claim the objective vacated my my late-Firewarriors.
I opened fire again. My skyray had to move, so it snap fired one of its markerlights, but still landed two ML hits! In other games my Skyray landed multiple ML snapshots as well. This guy was a crack shot apparently. Sadly, I completely forgot to use the ML hits to boost BS on any of my units! Still, I caused a few grounding checks and a single armour save, but he passed them all again! Unbelievable.
My gun drones fired and killed two of the gaunts in front of them, but he passed his leadership check. My Stealth team killed off the victorious Hormagaunts, and my assassin team put a couple wounds on his Trygon. Lastly, my Hammerhead killed several of the Termagaunt squad and caused it to flee off the table.
Results
We decided to call the game there. His Trygon would have to endure another round of shooting against my assassin team, and the termagaunts were only in assault range of the Stealth Suits. His Tryant might be able to clear off my Firewarriors from the objective, but it was only worth 1 point.
Tau = 9 points
- 7 points in objectives
- 1 point for LineBreaker
- 1 point for First Blood
Tyranids = 3 points
- 3 points for objectives (his lone Hormagaunt claimed an objective)
Thoughts
This game was a rough one for my opponent. He got unlucky and failed to roll Iron Arm on either of his Tervigons and then we got very unlucky with his reserves. I was able to deal with only one MC at a time. Plus I had some lucky rolls as well, killing the only Tervigon, capable of spawning, on the first turn.
Ironically, we'd discussed these issues with the Tyranid codex before the game started. I had asked how the Tyranid codex shows its age, and he said that things like reserves and psychic powers are directly related to how well the game goes for you. Without Iron Arm and decent reserve rolls, it's significantly harder on the Tyranid player.
He told me that usually he wouldn't take the Flyrant and would take some ravener units instead. However, he hadn't played Tyranids in a while and I guess he was hoping for getting all 3 MC's on turn 2.
This game was tons of fun. He was a great sport and we were able to joke and laugh throughout the game. I am also excited to see what the new Tyranid codex will bring. There is a lot of potential there.
Things I liked
- Submunitions. I love Railheads with submunitions. Another Tau player asked me why I took railguns when they are so un-reliable at tank hunting. I told him it was for the submunitions. The Ion blast may have better stats, but I prefer the reliability of the Submunition round along with the odd chance that you might insta-gib a vehicle.
- Gun Drones. Specifically, ones mounted on Piranhas. If I owned the model I would take 3 Piranhas for a full squad of 6 drones. They performed perfectly, harassing backfield and actually netting some decent kills.
- Assassin team. I always try to build a list without these guys, but I can't resist. They are too much fun, and adding the PEN to the squad was pure gold. At ~400 points, they are pretty expensive, but they aren't really in Deathstar territory either. Killing 2 Tervigons, and probably a Trygon, they were well worth it to me.
- CDS on Stealth Suits. This unit served as an excellent "core" for my line. They shot up anything that got too close and their supporting Overwatch fire was fantastic. I did make some positioning errors with them, forgetting that normal range/line of sight/cover rules apply. I probably should have just jumped them on top of the large central terrain piece and filled the early voids left by the fleeing Hormagaunts.
Things I wasn't impressed by
- Piranhas. On their own, they just don't really do it for me. I love them as drone deployment chassis, but otherwise they are just so unreliable. This game I got lucky and they were able to score. I think I would have appreciated them more if I'd used them as blockers
- Deathrain/Marker unit. Aside from a few ML hits here and there, this unit did nothing but tank wounds. Perhaps I'd appreciate them more if they'd had vehicles to shoot. I won't give up on them yet. At least they are a hardy ML platform, instead of the pushovers that Pathfinders are.
- Devilfishes. Probably my own fault, but they would have been much better used if I'd run them straight down his throat. As I played them they just wasted shots at his Hive Tyrant when they could have been up shooting biovores and termagaunts.
C&C are welcome. Let me know what you would have done differently.