Quantcast
Channel: Warhammer Tau
Viewing all 125 articles
Browse latest View live

Tactica: Fire Warriors

$
0
0
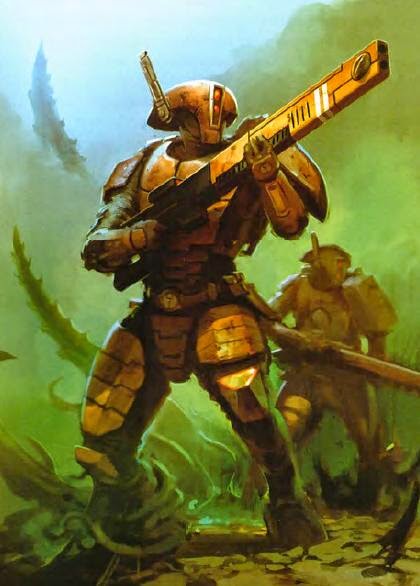
Hello and welcome to the next installment of our Tactica series. This time we will be looking at our basic grunt: the Fire Warrior.

Unit Description

The Tau Firewarrior has most of the stats of your standard Astra Militarum Guardsman, however he is almost double the points! This is mostly due to his superior equipment. Tau have abysmal reflexes, and so both their Initiative and Weapon Skill are 2 instead of the 3 most average humans have. 
He has a 4+ armour save, carries Photon (defensive) grenades, and either a Pulse Rifle or a Pulse Carbine. Both are S5 AP5 weapons but while the Rifle is rapidfire with 30" range, the Carbine is an 18" assault 2 weapon that causes Pinning checks. The weapon of choice, by far, is the Pulse Rifle.
The unit has access to a veteran upgrade, who can then add a couple Drones to the squad, and/or take a Markerlight . The unit can be "bonded" and they can be outfitted with EMP (haywire) grenades and can take the Devilfish as a dedicated transport.
The unit does not have very much flexibility in equipment options, but that keeps them focused.

Battlefield Role

One look at their stats and equipment and you know that these guys are meant for shooting stuff and almost nothing else. As Troop choices, in many detachments they will be benefit from Objective Secured, but that will not come into play often, though it does synergize nicely with the Devilfish. The Pulse Rifle is rightly feared by the enemies of the Empire and sets a Fire Warrior team on a level above most standard infantry. While your Broadsides and Crisis suits are targeting the enemy's prime elements, your Fire Warriors can quietly outmatch everything else at range.

Loadout

The standard equipment for a Fire Warrior is more than enough to make the unit effective but there are some options that can help with the unit's overall utility. The veteran Shas'Ui upgrade is great for units that will be operating on their own, especially full units that represent a larger point investment and will be taking more leadership checks throughout the game. However, his option for taking a Target Lock and Markerlight should probably be passed on most of the time. 
Giving your Fire Warriors Pulse Carbines will change their role somewhat. The shorter range and special rules turns them into an excellent disruption unit, but they will not be engaging the enemy at range. These units  do not interact with the Tau infantry HQ's as well as the Pulse Rifle does, making them better suited for independent operation.
EMP grenades are a per-model upgrade that can be a waste against horde armies, but a godsend against heavy vehicle lists. Usually, either every Fire Warrior unit is carrying EMP's or none of them will. Remember, during Overwatch one model can still throw an EMP grenade, though it will only matter if the thing charging you is a Walker or Chariot.
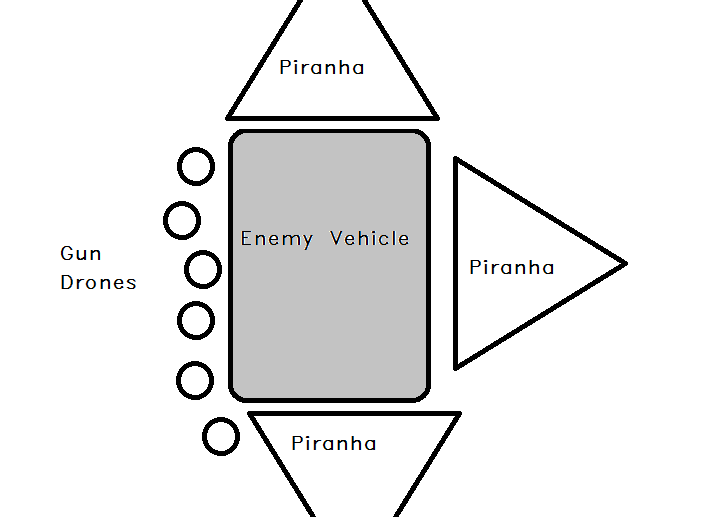
Adding Drones to the squad has its benefits but Tau players don't always have the points to spare. Marker and Shield Drones won't be a good choice for Fire Warrior teams but Gun Drones can be, since they add more layers to the unit's defensive capabilities. The high Initiative can save the unit from being overrun after losing an assault, and their twin-linked weapons will be more accurate during Overwatch. The Pinning capability is just a situational plus.

Combos, Synergies, and Lists

As our grunt infantry, they belong in most lists and synergize well with just about everything, but a few in particular:
  • Devilfish- Taking a Devilfish as a dedicated transport for this unit (in 7th ed) gives us a durable, slippery, quick vehicle that can steal or contest objectives from enemy units. It also is a necessary component in the deadly "Fish of Fury" attack.
  • Tau Infantry HQ's- All of the different Ethereals are custom-made to hang with your Firewarriors and make them better in every way. Cadre Fireblades make your backfield objective holder into a long range threat, especially against horde armies. The infantry HQ's are dirt cheap too.
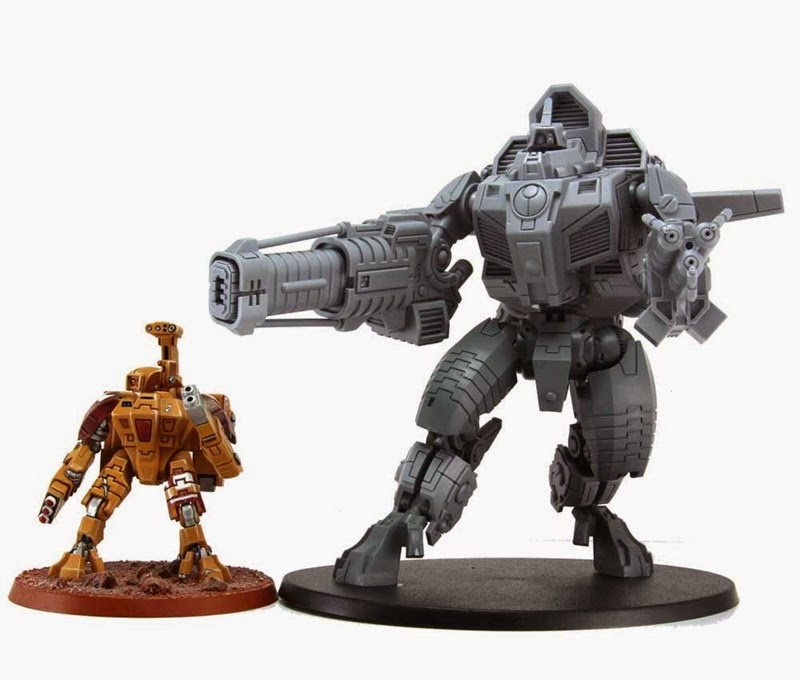
    Darkstrider presents some fun options as well, making the unit deadlier and giving them a good deal of deployment flexibility.
  • Broadside Battlesuits- The other essential unit to a Tau central firebase. They can handle all the things that your Fire Warriors can't crack, and the Fire Warriors can use their numbers and defensive grenades to screen the Broadsides from assault. The Broadsides' twin-linked weapons can be a great addition to your Overwatch as well.
  • Markerlight Support Units- Obviously, everything is better with Markerlights, but Fire Warriors have no other way to improve their middling Ballistic Skill of 3. This is a good thing, because if they were BS4 base, there would be no end to the complaining from other players and they would cost more than a Space Marine! Their weapon is great, but when you have a BS4 or BS5 Fire Warrior pulling the trigger, it is phenomenal . 
Farsight Enclave (FSE) armies require Bonding Knife rituals to be taken. For this reason FSE Fire Warrior teams are discouraged in a full FSE army since they are effectively 11% more expensive than a regular Tau Empire one, with no significant benefits. Fully Mechanized cadres may not benefit from Firewarriors as much as conventional cadres, since they aren't shooting while embarked, but they can still pull their weight, especially in 7th where their Devilfishes can handle the objective capping. Mechanized cadres will rely more on powerful Fish of Fury attacks than prolonged firefights at range to remove enemy infantry.

Tactics

Basic

The Tau Firewarrior unit is incredibly easy to use. Just point and shoot because they aren't equipped to do much else. If your opponent tries to hide, they can move 6" a turn while still being fully functional and they don't need a cover save against most small arms fire. They shoot stuff and cap any objectives when they need to, easy as that.
A cheap way to get the most out of your Fire Warriors, is to max out the squad and add a Cadre Fireblade. Plop them down on an objective in your deployment zone and go to work. Twenty-four S5 shots at 30" is no laughing matter, and it costs less than 170 points! Add just one Markerlight token and the damage potential starts getting vicious. His high leadership should keep the unit from fleeing after the unavoidable return fire takes its toll on the unit, and he can put an accurate Markerlight hit on other stuff while his unit mows down infantry.
Even without the Fireblade, they are a great unit and are the cheapest source of S5 shots in our codex, so there aren't any units in our codex that can put out S5 shots better than some Firewarriors.

Gunline/Castle

A few large units of Firewarriors accompanied by an Ethereal and put in hard cover or behind an Aegis Defense Line becomes a difficult target to remove. Though this formation wont be killing the enemy at range, it turns everything within 15" into a kill zone. Adding EMP grenades will make even a couple Imperial Knights think twice about charging in. Broadsides turn the whole thing into a respectable "castle" that your opponent cannot afford to ignore.
Usually the answer to these formations is either Deep Striking a unit behind the Aegis or Barrage artillery weapons. Both can be deadly to massed Firewarriors caught in the open so deployment can change if you know your opponent has some.

EMP Grenadiers

This is a squad of Fire Warriors (usually 6 or 8) carrying Pulse Carbines and EMP Grenades, often mounted in a Devilfish as well. Though not a super efficient shooty unit, it is capable of storming objectives and catching enemy vehicles off guard. The Devilfish can drop them off near some enemy vehicles in the backfield then zoom off to cap enemy objectives. The Grenadiers can have their way with any vehicle they can assault and their 18" weapon range is perfect for disruption tactics. In a pinch you can try to shut down a low Initiative shooty unit with a Blind check and some Pinning attacks.
The unit is fairly expensive, but can turn into a real pain for your opponent as their Blind, Pinning, and EMP attacks start to add up over a couple turns.

Fish of Fury

A tactic as old as the Tau codex, and it still works great. Here is how it works: a loaded Devilfish advances toward an enemy unit and the Fire Warriors disembark within Rapidfire range (15" for Pulse Rifles) while the Gun Drones disembark from the Devilfish as well. The unit will be at full shooting capacity because they were safe in the Devilfish up until now. The unit unloads everything it has into the enemy unit, doing as much damage as possible. When they are done, the detached Gun Drones use their Thrust move to position themselves, along with the Devilfish, between the Fire Warriors and whatever survived the attack, screening them from assault. If the enemy has 5+ armour, the warriors deploy to the front and sides of the Devilfish to deny them a cover save, if against 4+ armour or better they deploy out the back of the Devilfish and shoot under the skimmer. Irregardless, they have to be in Rapidfire range.

This tactic can be amplified by using two Devilfishes on the same target, resulting in a Double Fish of Fury, though it is difficult to orchestrate correctly. An Ethereal can also be added and left inside of the Devilfish to provide an extra shot to the Rapidfiring Fire Warriors and the detached Gun Drones. It is also worth noting that Gun Drones can detach from the vehicle and Assault the targeted enemy unit after the FoF attack, possibly tying them up in close combat on your opponent's turn.

Conclusion

Tau Fire Warriors are (in my humble opinion) the best basic infantry in the game. They have a clear, focused goal and everything about them is perfectly suited for the role; no wasted points on stuff they won't use. 
  • The Pulse Rifle or Carbine is S5, allowing them to hurt anything short of AV12 or Toughness 9
  • Their armour is 4+ allowing them decent armour saves against the oh-so-common AP5 weapons (including our own!) and a higher level of mobility, as they can venture away from cover.
  • They are cheap enough to field in large quantities, but expensive enough that every trooper can matter.
  • Their Ballistic Skill is average, but they have lots of synergistic units that help them get more shots off AND increase accuracy. 
  • Their greatest weakness is in actual close combat, but anything that gets into combat with Fire Warriors is hardly going to care whether they are WS2 or 3. Plus, no matter how skilled the opponent, the best they can hit on is a 3+ while the worst you can hit on is a 5+. The Photon Grenades and Overwatch fire can knock the wind out of an enemy assault and end with a surprising victory for the Fire Warriors.
Few infantry can boast the same level of balance in offense and defence as the Tau Fire Warrior. Rejoice, for you are the envy of other commanders, wishing their expensive-unfocused Tactical Marines or less-than-useful Guardsman would learn a thing or two from the Tau.

Comment with your thoughts on Fire Warriors!

Tactica: XV-8 Crisis Teams

$
0
0
Next up is the renowned XV-8 Crisis Team. They are the heart and soul of the Tau army, and they have been since Tau were first released. Let's see how to best utilize our old friends in 7th edition 40k. Strap yourselves in, this will be a long one...

Unit Description

An XV-8 team is made up of 1-3 crisis battlesuits and up to 2 drones per suit. An XV-8 has the same initiative, weapon skill, and ballistic skill as a Firewarrior, despite their status as elite infantry. Their elite status is shown in their higher leadership, an extra attack, and their crisis suit. The suit itself grants a 3+ armour save, an extra wound, toughness 4, and an impressive strength of 5. It comes with a built-in Blacksun Filter (Night Vision, Blind Immunity) and a Multi-Tracker (fire two weapons in shooting phase). In addition, the suit makes the model Jetpack Infantry.
They can each take three weapons or support systems in any combination. The veteran upgrade has further access to signature systems (one-per-army items). The possibilities for these teams are limitless, granting them a level of customization unmatched by any other unit in the game.

Battlefield Role

A crisis team can fill any role required, which makes it very hard to describe what their role in the Tau army is. Some players build their army around the crisis teams, selecting other units to complement them. Other players put the crisis teams in last, filling any holes left by their other units. They can be Anti-infantry, Anti-tank, Anti-air, Anti-transport, Anti-TEQ (terminator equivalent, or 2+ armour saves), Anti-monstrous creatures, etc. Their high strength and extra attack even make them not-so-bad in close combat, though "dedicated close combat" is one of the few battlefield roles that they are NOT capable of executing well.
If you have tons of Firewarriors and Broadsides with Missile Pods, then you are short on Anti-TEQ and maybe Anti-Tank so you throw in some Helios* or Sunforge-D*.
You've got Hammerheads and Piranhas so you are short on medium firepower. Missilesides are too slow to keep up with your vehicles, so you take some Deathrains* or Fireknives*.
You know you are going to be facing a Green Tide (horde of Ork Boyz) army, so you start your list building with a couple squads of Heatwave-D*. 
Your opponent is notorious for bringing mobile artillery, so you add a couple Sunforge* or Fireforge* monats (single crisis suit) for Deep Striking behind enemy lines.
All this is to say that their battlefield role can be almost anything you want it to be, and they will be good at doing it.

*See HERE for an XV-8 naming guide.

Loadouts

Again, the possibilities make this a hard thing to nail down in a Tactica summary, so I'll say a few words about each option. Let's start with the weapon choices, in order of popularity:
  • Plasma Rifles. Often taken as a pair to maximise AP2 fire output. As AP2 is lacking in other parts of the codex, I am putting this as the most popular weapon choice. 
  • Missile Pods. I consider this weapon a close second in popularity. The Missile Pod is awesome and cramming more of them into your list is never a bad idea. The only reason this one loses out to the Plasma Rifle, is because Broadsides can put out more Missile Pod fire with greater accuracy. Can be taken as a pair, but are often twin-linked to save points.
  • Fusion Blasters. Crisis suits are the best firing platform for this weapon, though it is available in a few other parts of the codex. Either taken with a Plasma Rifle for low AP utility or twin-linked and put on a suicide Monat for Deep Striking next to enemy heavy armour.
  • Flamers. A handy add-on for Overwatch support, but rarely the suit's primary weapon
  • Burst Cannon. Works great on an XV-8 but there are plenty of other sources for S5 firepower, so it is not usually taken.
  • Specialty Weapons. The Cyclic Ion Blaster and Airbursting Fragmentation Projector are both excellent weapons, but you can only take one of each in your army. In addition, their profiles make them less synergistic with the more popular weapons (Plasma Rifles and Missile Pods). 
Now, the support systems. Often Crisis suits will forego any support systems to save points, but there are a few popular ones.
  • Stimulant Injectors. Though too pricey to put on a suicide Monat or your cheap Deathrains, it can be a good investment for full squads carrying dual weapons.
  • Advanced Targeting System. Super cheap and easy to put in the list, and it synergizes well with the Plasma Rifle and the squad veteran upgrade.
  • Target Lock. Perfect for getting the most out of your units and ensuring that each suit is using his weapons to the fullest.
  • Drone Controller and Vectored Retro Thrusters really depend on what you are building the squad to do. They are usually a "one-per-squad" type of system. 
  • Counterfire Defense System. A useful upgrade, but Stealth Suits make better use of it. You're probably better off just tacking on a spare Flamer for Overwatch defense.
  • Velocity Tracker. Fairly useful on Deathrain teams, but expensive. Broadsides and Tau Fliers should be your primary anti-air, but if you need the mobility, or don't have those models, the crisis suits can fill the gap nicely. 
  • Shield Generator. A 4+ invulnerable save is awesome, but for the same points you could buy two Shield Drones, and the Stim Injectors will usually be the better option anyways.
  • Early Warning Override. Awesome system, but Riptides and Broadsides are better suited for this system, as their weapons are more potent. 
  • Positional Relay. Only useful for bringing in Outflankers and it is a "one-per-squad" upgrade. Situational at best, but a Reserve-heavy list could make good use of it.
 Here are a few common ways to setup your crisis teams:
  • Basic. Helios, Fireknife, and Deathrain are all high utility loadouts and are the most common choices. Squads with these loadouts are used both at range and up close, using terrain to stay alive. Usually each suit will carry the same equipment to help focus the team's targeting priorities.
  • Deathrain Marker Team. The crisis suits carry Missile Pods and a Target Lock. One of the suits trades a Missile Pod for a Drone Controller. Then they take the maximum of 6 Marker Drones. The Drones fire at a higher ballistic skill and the Deathrains are free to target other units. 
  • Suicide Monat. A single crisis suit that Deep Strikes onto the battlefield to fire with close ranged weapons, doing as much damage as possible before being destroyed. Usually carries Fusion Blasters or Flamers, depending on the intended target.
  • Close Support. An uncommon build, but fun nonetheless. Use cheap, close weapons like Burst Cannons and Flamers an a couple suits accompanied by some Gun Drones. Using the Jetpack Thrust move to stay out of assault range, the team peppers an enemy infantry advance and acts as a speed bump when the enemy eventually catches up to them. Vectored Retro Thrusters are a good support choice, especially if the squad contains a drone or two. This is essentially building a mini-XV9. 

The Executioner

I will share one of my favorite unit builds: the Executioner. It is composed of a Shas'O carrying two plasma rifles and an ATS, two Shas'ui with two plasma rifles and ATS, and a Shas'vre with M3S, CCN, and choice of third system. The unit costs a bit under 300 points before you add in drones and the other support systems on the Shas'O and Shas'vre.
At 12" the unit puts out 12 plasma shots that Ignore Cover and are twin-linked. The ATS gives you good odds of landing some precision shots for picking off special weapons or standard-bearers (especially that model granting Feel No Pain to the rest of the unit). It is designed to surgically cut specific units or models from your opponent's army, crippling its overall effectiveness and is the perfect unit for carrying out the Nen'em'Ka (Spear Thrust) strategy.

Combos Synergies and Lists

As the tried and true heavy hitter of the Tau army, the crisis team synergizes well with virtually everything in the codex. A few units stand out though.
  • Naturally, the XV-8 Commander has the most synergy with a crisis team. They are all wearing XV-8 battlesuits after all.
  • Broadsides. Unlike the other battlesuit variants, XV-88's do not compete with crisis teams for an Elite slot in a detachment. They also put out more firepower with greater accuracy, lightening the load on your crisis teams and acting as the bait for the Kayoun strategy (Patient Hunter).
  • Hammerheads. In truth, a Hammerhead cannot put out the same amount of firepower as a full crisis team, but it does bring a powerful Large Blast attack on a decent vehicle chassis. This gets your opponents' attention, drawing anti-tank firepower that would otherwise be insta-killing your crisis suits. Like all Tau vehicles, it can also provide mobile cover for your crisis team as it moves about the field.
  • Markerlight sources. Everything synergizes with Markerlights, so this has to be put in here. Crisis suits can twin-link their weapons to improve their performance but nothing beats a couple Markerlight hits. Pathfinders can be especially synergistic, as they can take the Recon Drone and guide in Deep Striking crisis teams

Tactics

Crisis teams require the mastery of a few basic skills. Practicing these tactics will vastly improve your crisis team efficiency and turn a good unit into an unfair one. 
  • Jetpack Thrust moves+Cover. Do a little bit of research on the odds when rolling two dice. This helps you gauge how far you can move your suits out of cover or how far they'll be able to go when making a dash for an objective. You also might find it extremely helpful to start bringing terrain pieces that ACTUALLY block line of sight to a crisis suit. Crisis suits need to avoid being targeted to stay alive and keep shooting, so block line of sight because regular cover isn't going to be enough.
  • Wound allocation (aka Shenanigans). Lack of LoS blocking terrain results in targeted crisis suits and, inevitably, unsaved wounds. Taking the veteran upgrade allows you spread wounds around in the squad. With a couple drones and decent Look Out Sir rolls, your squad can take 4-5 wounds before losing any of its shooting power. Attaching a Commander adds to the resilience with his 4 wounds and 2+ LOS rolls. 
  • Rearranging. The thrust move allows you to jump back in cover, but also lets you "rearrange" your squad. You can cycle wounded suits to the back of the unit, or position drones so that they are out front. This is an incredible ability, as it lets you move to get all your suits in optimal shooting range, then prepare yourself for incoming fire by choosing what models will get hit first. Other races struggle to get their powerful weapons in shooting range without making them easier to hit. This rearranging can be the difference between losing a suit and not. Even if it postpones the loss of a crisis suit by only one turn, that is one more turn you have to shoot with it, and a single crisis suit can make a difference.
  • Pre-measure. In past editions, this skill was learning how to gauge your distances (usually 12" or 18") but now you can pre-measure whenever you want. Abuse this advantage. Crisis teams usually have to be within 18" of enemy units in order to maximize their shooting potential. Jumping your suits the minimum distance before hopping away again will keep them just close enough to shoot at full capacity and just far enough that a charge is likely to fail. 

Deep Strike Assault

XV-8's Deep Striking all over the field, getting up close to use their short range weapons or getting flank shots on vehicles. This is Mont'ka (Killing Blow) and aims to hit your opponent hard, all at once, crippling his ability to retaliate. Farsight or a regular Tau Shas'O with the no-scatter warlord trait, are excellent leaders for this assault, as they do not scatter while Deep Striking.
Usually, this requires Reserve Roll manipulation through ally characters or by taking a Comms Relay in a Bastion or Aegis Defense Line. Without the manipulation you are at the mercy of the dice, hoping that all your suits arrive on the same turn. The drawback to this tactic is giving your opponent an advantage early in the game, so your units on the board need to be pretty resilient in order to last until reinforcements arrive. 

Let's Get Tactical

XV-8's are speedy. You have good odds of moving them 12+ inches a turn, while firing both weapons. Their Jetpack also allows them to hop over walls or other obstacles. This makes them excellent objective cappers. Keeping the crisis unit costs low, and investing the points in other heavy hitters gives you decent infantry units capable of moving about the board and nabbing tactical objectives as they come up. Most objectives will be within 24" of eachother, so positioning your XV-8's to go for either (depending on what Tactical Objectives you draw) can be a good way to go. VP's are what wins games.

Mini-Broadsides

Load them up with Missile Pods and plant them in your deployment zone. They do the same job that Missilesides do, but they get to be a bit more mobile at the cost of accuracy. More Missile Pods is never a bad thing, so they work great as an alternative to Missilesides or even alongside them.

Suicide Monat

Very simple tactic. You drop a single crisis suit carrying a twin-linked Fusion Blaster as close as you can to an enemy vehicle (you need that 9" Melta range). It is about a 40 point investment for a shot at killing a vehicle outright. This tactic is less effective in 7th edition, but it still works and has the added bonus of possibly grabbing Tactical Objectives that you wouldn't normally be able to go for. 
Alternatively, if you know that you'll be facing an horde army, or want to prepare for it you can switch the Fusion Blasters for a couple Flamers. This is 10 points cheaper but you have to land even closer to your target to make the most of your two template attacks.
This tactic is more viable in armies that can field lots of Crisis suits, like Farsight Enclaves or in an Unbound army.

Conclusion

XV-8's are the heart and soul of most Tau armies. They are insanely customizable and can do darn near anything that you want them to do. They have a bit of a learning curve before you get the hang of them, but once you master the basics for fielding them, they only get more powerful. 
Adaptability is a tool that has no points value, but is a huge advantage. Crisis suits give you so much choice while list-building, deploying, and playing. Few armies can change their original strategies in the middle of a game, sometimes they can't even change it after Deployment is over, but Tau can because our battlesuits are built for dealing with every situation at a moment's notice. A crisis suit has good stats and weapons, but its real strength is in the intangibles that it brings to your army.

Thanks for reading! Comment below if you think the article is missing something. Goodness knows, a full article on Crisis Suits could go on for pages and pages.

Tactica: Piranha Light Skimmer

$
0
0

As requested, the next Tactica article will be the Piranha Light Skimmer. Piranhas were one of the biggest winners when the 6th edition codex was released, but a high dollar-to-point ratio keeps these guys from swarming the tables of casual gamers.


Unit Description

A Piranha Light Skimmer team is between 1 and 5 Piranhas. Each Piranha carries a pair of Gun Drones and a Burst Cannon (which can be switched out for a Fusion Blaster) giving it the same damage output as a Devilfish. It is an open-topped, fast, skimmer that can take Tau vehicle upgrades but is often run bare-bones. Unlike other light skimmers, the Piranha has a front armour value (AV) of 11, and AV10 on the rear and sides, making it deceptively tough. 
All this comes at the incredibly low price of 40 points each. However, if you remove the cost of the detached Drones from the model (14 points each), you end up with a Burst cannon on an AV11/10/10 skimmer chassis for 12 points! That is a steal of a deal if I ever saw one.

Battlefield Role

The Piranha can serve a few purposes on the field. It is an excellent vehicle that has unique uses, all while being a cheap point investment. Be warned, unlike most other Tau units, the Piranha is not a shooting powerhouse. As the name suggests, Piranhas can be deadly in numbers but aren't much more than a minor nuisance on their own.
  1. Drone Delivery. Dropping off the Drones should be one of the first things your Piranha does. Whether you are dropping them in your backfield as screens or in your opponent's area to harass, they need to get off before the Piranha(s) gets destroyed. These Gun Drones are factored into the cost of the Piranha, so it would be a waste not to demount them.
  2. Blocking. A fast skimmer can put itself almost anywhere on the board at a moment's notice. Piranhas are fairly large and are perfect expendable vehicles for blocking enemy advances.
  3. Objective Capping. With their turboboost, a Piranha can move 30" in a single turn. No objective is out of reach when you have Piranhas, and larger squads can actually tank shock enemy Troops far enough away from objectives to steal it from them too.
  4. Shooting Stuff. This is, ironically, going to be the last thing your Piranhas should think about. It is true that they are the cheapest way of getting a Fusion Blaster or Burst Cannon onto the board, and in squads of 3 they can put out respectable amounts of firepower. However, they are most useful while focusing on the first three roles.

Loadouts

Most of the options available to Piranhas are not taken, simply because Piranhas are so cheap to begin with (who is going to pay 15 points to put a DPod on a 12 point vehicle?). Sensor Spines can be a good upgrade because it is cheap and gives Piranhas a greater degree of freedom when trying to block enemy units or get into cover in the enemy backfield.
The Fusion Blaster is a good upgrade if your opponent takes vehicles. A single Piranha will not likely kill anything, but a squad of three is more dangerous. Your opponent will see that fast moving Fusion Blaster and will consider it a greater threat than it probably is. Some would argue that the 25% increase in cost is never worth it on the Piranha, and they may be right, but you are also paying for the perceived threat.
Seeker Missiles are a situational option that players sometimes take. If you have markerlights to help fire them then they can be effective but, like most of the upgrades, are usually too expensive to put on such a fragile chassis.
A Piranha team can vary in size, but should be run in squads of 2-4. Two is ok, but they lack punch and durability. Four is also ok, but their footprint is a bit large. Three is the sweet spot. It is enough models to put out respectable firepower, it isn't very expensive, it is not so huge that it is hard to find places to move them, it is large enough that it can block things effectively, and the squad can take a casualty before becoming basically useless. If you can field three, do it.

Combos, Synergies, and Lists

Piranhas work very well with other Tau vehicles. The front AV11 renders them immune to most enemy small arms fire, and demands heavier firepower that is usually reserved for Devilfish or Hammerheads. Running them alongside heavier Tau skimmers will help keep them alive through target saturation.
A Piranha's blocking uses are most noticeable when working alongside Tau infantry and Broadsides. Pathfinders, Fire Warriors, Kroot, Sniper Drone Teams, and Broadsides are all relatively slow elements in a Tau army. They need to stay put or move very little in order to keep up their damage output. The Piranhas block enemy advances, buying more time for these units before the enemy gets into assault. 

Tactics

Here are some simple pointers on fielding your Piranhas.

Positional Play

A Piranha is the perfect blocking vehicle. It is cheap, expendable, somewhat large, fast, and not entirely a pushover against enemy shooting. It can zoom around, screening your units, capping objectives, or blocking movement lanes for enemy tanks and infantry. THIS article on ATT goes into Positional Play in more depth. The basic idea, is that you move your Piranhas into positions that make movement and assaults difficult for your opponent. He cannot shoot before he moves, and so he must either try to go around (a long ways if it is three Piranhas) or he has to give up this turn's movement to shoot your Piranhas. If he assaults them, they are likely to die, but he will not get to consolidate after killing them, so they still served their purpose. The Piranhas will likely further slow him down as they become rough terrain.
Nothing will drive your opponent crazy like 120 points of Piranha holding up 500 points of Land Raider+Scary Assault Unit for a turn or two.
As a bonus, after detaching the Gun Drones, they can serve the same purpose. HERE is the section in the same article that describes using Drones for positional play. It is much of the same philosophy: screen your important units with cheap, mobile, expendable drones.

Backfield Harass

Piranhas and their Drones can be a massive headache for your opponent. The tactic is simple:
  1. Move Flat Out into enemy territory, getting hard cover if possible.  If there is very little cover and your Piranhas are forced to Jink in order to stay alive, don't worry because they are still doing their job of attracting enemy attention.
  2. On your next turn, detach Gun Drones and move to attack enemies. Light vehicle rear armour, artillery crews, infantry on objectives, long range firepower units, etc. Note: the Drones are still effective even if the Piranha Jinked in your opponent's turn.
A squad of three Piranhas can put out 12 S5 shots at BS3: not bad against AV10 vehicles. The 6 detached Gun Drones also put out 12 S5 shots, BS2 but twin-linked. The Drones can disembark, fire their carbines, and assault their target all in the same turn because they are considered as disembarking from an Open Topped vehicle (Piranhas ARE open topped, but this rule also goes for Drones mounted on other Tau vehicles). Unfortunately, Drones have a Strength of 3, so they won't be able to destroy vehicles in close combat, but they can easily tie up some Heavy Support infantry.
Now your opponent has two separate units to get rid of, and that will draw heat away from your heavy hitters. The only real disadvantage to this tactic, is that your Piranhas will likely die early and will not be around to cap objectives, block enemy units, screen assaults, etc.

Hunting Vehicles

Though the Piranha is not exceptional at it, it can be used to hunt vehicles. For this you will usually need a minimum of three piranhas. You can take Fusion Blasters, but Burst Cannons work just fine against most light vehicles' rear armour and Piranhas have a better chance of seeing that armour facing than our other vehicles. The gut reflex is to buy Fusion Blasters and put them as close to enemy heavy vehicles as possible (Land Raiders) but Piranhas really should be hunting weaker prey. Targeting enemy vehicles in your opponent's backfield is where Piranhas shine, and it is a cheap investment considering what your opponent will need to do to remove them. If you really want to go for those Fusion Blasters, they can be worth it, but keep in mind that adding a Fusion Blaster is over an 80% increase in the cost of the Piranha (25% increase of the total cost of Piranha+Drones).

Feeding Frenzy

Piranhas can cause additional problems for transports, on top of the blocking or damaging. By positioning your Piranhas across the access points, any model disembarking must make an Emergency Disembark, which renders them completely useless for their turn. Even if you are unable to force an emergency disembark, you can force the passengers to disembark on the side of the vehicle that you want them to.
A Piranha "Feeding Frenzy" is when Piranhas are able to completely surround an enemy transport vehicle, making it impossible for models to disembark, even by Emergency Disembark. Often, your Piranhas will need to coordinate with other units (like their own drones) to pull it off. When trying this, the objective is to wreck the vehicle, not Explode it. If it Explodes then the entire transported squad will be placed where the vehicle used to be, making your careful Feeding Frenzy placement a waste.

Example: A Rhino, carrying 10 marines is moving up the field. You have 3 Piranhas within 9" of the left side of the Rhino. They disembark their drones 6" towards the nearest face and then move for the Rhino's other facings. The Piranhas move Flat out to position themselves <2" from the Front, Back, and Right facings. They must remain within 4" coherency, but they need to be <3" away from each other. The Drones run a minimum of 1" to be <2" from the left flank of the Rhino. This makes it impossible to place a space marine in contact with the hull without being less than 1" from the Piranhas or the Drones. See below.
Quick sketchup of the ideal Feeding Frenzy
A unit of Deathrains fires on the Rhino and wrecks it. The 10 marines inside of the Rhino are automatically destroyed, because they cannot be legally placed before making their disembark move. 150+ points of marines killed by 120 points of Piranha, and all the Piranhas had to do was be there. Note that all models must be legally placed before making their disembark move, so even if a few marines were able to disembark (due to bad run rolls or a very large vehicle size), the rest of the squad would perish.
Granted: This is an idealized situation and may not happen very often, or ever. It is just intended to demonstrate the tactic. 

Conclusion

Piranhas are an amazing vehicle, especially considering they are dirt cheap. They are not a heavy-hitting powerhouse, but they bring several elements to your army that you cannot get anywhere else in the Tau codex.
The blocking and screening potential from piranhas and their drones is fantastic, and can hold up enemy advances long enough for the rest of the Tau forces to pulverize them with long range firepower. When not blocking enemy units, piranhas and their drones make perfect backfield harass units or long range objective cappers.
Many players field one or even two Piranhas (there is one in the starter set after all), but are unimpressed with the results and stop playing them. Adding the third Piranha can make a huge difference. The only major obstacle for players wanting to field lots of Piranhas, is the monetary investment. Paying $30 for 40 points is really expensive. However, assuming you can pick some up second-hand, or have the cash, a squad of 3 Piranhas will not disappoint if given the chance.

Let us know what you think. Did we miss something? Do you use your Piranhas for other purposes?
-Skyler

Tactica: Hammerhead

$
0
0
Hammerheads are the Tau Empire's standard battle tank. It is a hardy vehicle that can has changed roles as time has gone on. Once the premier anti-tank vehicle in the game, now the bane of infantry everywhere.


Unit Description

The Hammerhead is a skimmer tank with average armour of AV13/12/10. Like most Tau vehicles, it carries a pair of drones that can be swapped out for a Twin-Linked Smart Missile System. It has access to all the regular equipment upgrades, carries one of two awesome primary weapons, and even has the option for the Hammerhead Ace: Longstrike.
The main weapon is either the signature Railgun or the new and improved Ion Cannon. Previously, the Ion Cannon was less attractive next to the Railgun but it has been remade in the 6th edition codex (and the 7th edition changes to vehicles).
The price tag is modest and it is a vital component in fully mechanized Tau lists, but is often passed over for Broadsides in hybrid or gunline armies.

Battlefield Role

When it was first released, the Railgun's range and stats were unheard of (8'x4' boards were more common back then too). The Hammerhead was an instant favorite as a tank hunter. It was tough, very mobile, and lethal. Infantry was a secondary target, fired at by the secondary system, thanks to the vehicle Target Lock. This changed when 6th edition codex hit.
Under the current edition the Hammerhead has moved away from Tank Hunting and has chosen to excel at clearing infantry. Thanks to the large blasts from either of its main weapons, it is the Tau's primary pie-plate launcher (except maybe the Riptide's overcharged Ion weapon) so it targets large groups of infantry. To a degree, the Riptide can imitate the Hammerhead's weaponry, on a more mobile Monstrous Creature, firing platform. Normally, this would replace the Hammerhead, but Riptides are Elites, so you can have both!
It is also a tough nut to crack. AV13 or AV12 can be hard to kill even when the tank doesn't Jink or jump around cover. Therefore, it also serves as a bullet magnet for your lighter Devilfishes, taking the heat so they can steal objectives. Like the Riptide, it is a high profile target that has to be used as bait, luring your opponent into bad positions or bad decisions.
It can also be used in an Anti-Tank capacity, but will often require the Longstrike upgrade to reach acceptable efficiency.

    Loadouts

    A Hammerhead works well without upgrades, however it will almost always be fitted with a Blacksun Filter. Sensor Spines are pure gold, so they are a favourite choice as well. Smart Missile Systems can replace the Drones, but it is entirely player preference. Disruption Pods are popular, but I find them to be less useful in 7th edition. Hammerheads cannot Jink if they want to continue firing their large blasts, so they will rely on terrain for cover saves. Even so, +1 to a cover save is never a waste, even if your Hammerhead spends the whole game in the open.

    If the Railgun is equipped, you'll need Submunitions if you want that large S6 AP4 blast for clearing infantry. However, Ion Cannons are the more popular choice of primary gun. The large S8 AP3 blast is too good to pass up, even if it does have a 1 in 6 chance of failing altogether.
    Personally, I am a fan of the Railgun with Submunitions. It is consistent (does not Get Hot) and the Riptide has a harder time duplicating the effect. True, the riptide burst cannon has the same Strength and AP, but Riptides are inaccurate and have a hard time landing as many hits as a Hammerhead. As an Ion platform, the Hammerhead is overshadowed by the Riptide and its Ion Accelerator.

    The Hammerhead Ace: Longstrike changes your target priorities. To get the most out of his BS5 Tank Hunter abilities, he should be killing vehicles. If he has a Railgun, then he has a 15% chance of killing a Land Raider in a single shot (which is actually pretty good in 7th edition). Giving him an Ion Cannon yields great results when he is targeting lighter armour too. All around he is good, but the cost drives the total price of the Hammerhead a bit high for most players to be comfortable fielding him.
    However, against Astra Militarum, Longstrike is almost an auto-include as he basically re-rolls all of his to-hit, to-wound, and to-penetrate rolls.

    Forgeworld Turrets

    I wont talk much on the Forgeworld turret variants. Mostly because I feel that none of them are really awesome under the 7th edition rules. So here is a quick rundown on each. I have playtested the burst cannons, but I have yet to try the others.


    • Two Long Barrelled Burst Cannons: Not bad, but in the end it is just more S5 AP5 shots. If that is what you want then this is actually not a bad way to go. I used it with my Farsight Enclaves (not much S5 AP5 there) and it did ok.
    • Two Twin-Linked Missile Pods plus Velocity Tracker: Interesting. Seems like a solid anti-air option, especially since Skyrays got nerfed so hard. Lonstrike could make for an interesting combo here, even if it does end up pretty expensive. I'm working on a conversion using some High Yield Missile Pods.
    • Two Plasma Cannons: good for MC hunting, which might actually be worth it with all the Riptides, Wraithknights, Daemons, and other MC's running around. But it has to remain stationary to be fully effective. Running solo, it may not cut it, but two of these could ruin a Wraithknight or Riptide's day in a hurry.
    • Two Fusion Cannons: At 12" it could crack Land Raiders, but if a Land Raider is 12" away, it is too late already. Of all the variants, this one impresses me the least. The fact that the weapons are Blast means the Hammerhead absolutely cannot move if it wants to fire at full effect. However, with a 24" range it will need to move if it wants targets. Still, I'm sure it can be effective in the right circumstances. Deep Striking TEQ or any Deep Striking non-flying vehicles would be the targets of the choice. It could be useful at taking out Rhinos and the like as well.

    Combos, Synergies, and Lists

    The Hammerhead fits in well with other Tau vehicles and with battlesuits.
    The anti-infantry firepower the Hammerhead brings, can replace (to a degree) the need for Tau infantry. Battlesuits often have specific roles, and anti-infantry is seldom one of them, so the Hammerhead picks up the slack. In addition, the Hammerhead can keep pace with Crisis Suits, and soaks up the S8+ firepower that would normally be insta-killing your XV8's. Riptides carry similar firepower, and the Hammerhead provides redundancy without spamming Riptides and without attracting too much attention.
    When used alongside vehicles, it saturates the field with armour, forcing your opponent to make harder decisions. There is only so much anti-tank to go around, and in most games your opponent will have to choose between the super-scoring Devilfish and the big-gun-toting Hammerhead.

    Tactics

    Hammerheads are pretty simple to use. Since  you really can't Jink without giving up your next turn of shooting, you should put your Hammerhead somewhere in cover where it can also command as much of the table and firing lanes as possible. (thank goodness that heavy gun is mounted so high on the model!)
    Sit in or behind cover, then shoot the preferred target until the enemy kills it. It will act as a base for your army to move around, and will also serve as bait for your Kayoun tactics.

    Pie Plate Launcher

    The Hammerhead can put a pie plate just about anywhere on the board. The Submunitions tear through anything but power armour equivalents. The overcharged Ion Cannon wipes away 3+ armour with ease. Just point it at the preferred infantry target and shoot. Your opponent will need to address it, and it is basically bait anyways. Broadsides can emulate the firepower with their High Yield Missile Pods, but they are less mobile and are not as tough. The Riptide is one of the only other units capable of delivering a pie plate like the Ion Cannon, but is a bit more expensive and is a different beast altogether. The Riptide works like bait too, but more as an "in your face" type of bait.
    A drawback when playing this way, is that it cannot snap-shoot the pie plate. If it is forced to Jink, it is effectively useless for a turn. When forced to jink, use the next turn to move Flat Out and reposition. 

    Hunting Vehicles

    When combined with Longstrike, a Hammerhead becomes a fairly potent anti-tank platform. Either a Railgun or an Ion Cannon will work, as its targets should usually be light-to-medium armour. Broadsides will often do this better, for cheaper, but some people really want to kill enemy vehicles with one shot, and Longstrike in a Railhead is one of the best units in the game for doing exactly that. Even so, for him to be worth it, you'll need to kill a couple vehicles, and you'll need at least 3-4 turns to make that happen.
    When playing this way, the Hammerhead needs to stay alive longer, so it may need to move about the board and keep out of reach. It still can't Jink, but it can at least buy itself another turn or two of shooting. In order to keep it shooting at full capacity, you'll need defensive upgrades, marker light support, and a Riptide or something similar for attracting attention away from your Hammerhead.
    You may find yourself frustrated (I swear my Longstrike has missed more shots than he has hit) but all that anger melts away when he finally nukes that Land Raider on turn 1. I wouldn't recommend the anti-tank role in a tournament setting (too much variance in performance) but I would recommend that everyone try him in at least a couple games.

    Conclusion

    Hammerheads are an oldy but a goody. The 6th edition Tau Codex and the 7th edition of 40k were not kind to this vehicle, but it is still worth putting on the table. Its powerful weapons are often overlooked for the newfangled Riptide's and it is hard to compete with Broadsides for a heavy support slot, but it manages.
    In a full Mechanized list, Hammerheads are necessary for supporting your battlesuits and Devilfishes. In a static Gunline, it still pumps out nice large blasts. It isn't an OP unit but it isn't one of the "losers" of the codex either (Vespid). It is iconic and I think it has a place in just about every Tau army, even tournament ones. It may not be the crazy good tank that it was before, but it is still pretty darn.

    Let us know what you think. Did we miss something? Do you use your Hammerheads for other purposes? Do you use them at all now that the Riptide is top dog?
    -Skyler

    Riptide Variant: XV109 Y'vahra from Forgeworld

    $
    0
    0
    Introducing the newest addition to the Tau Empire: the XV109 Y'vahra! I am over the moon about this new battlesuit, so I figured I'd post about it!


    Background

    This bad boy was engineered by the same Fio that designed the XV107 R'varna. While the XV107 acts like the Riptide version of a Broadside, the XV109 acts like an XV9 Hazard. The Hazard was designed as close assault suit, designed to operate independently and harass an enemy advance while the main Tau force got into position.
    Like the XV9, the XV109 operates independently from the hunter cadre (nothing else can keep up with it!) bringing the fight to the enemy and wreaking havoc on its advance.

    Here is the Forgeworld page with more pictures, and the fluff: XV109 Y'vahra
    And here are the Experimental Rules. These are the first round and are likely to change before finalization.

    Description

    Stats

    The Y'vahra statline is similar to a regular Riptide, but with two important differences: 4 wounds instead of 5, and Ballistic Skill 4 instead of 3. This emphasizes the suit's role as a bit of a glass cannon and puts damage output over survivability. One wound may not sound like much, but it can be a big deal, especially when this suit will almost always need to be Nova charging.

    It has access to all the regular Riptide upgrades and it can take the Shielded Missile Drones OR regular Shield Drones. I'm not sure The base price for this suit is 230 so it isn't cheap, even before you add in upgrades, and you'll want them.
    It is also a Fast Attack option for Codex: Tau Empire so it doesn't compete with Riptides or R'varnas. 9 Riptide CAD? Yes please!

    Equipment

    The XV109 suit comes with the regular 2+ 5++ Riptide saves, but the invulnerable save becomes 4+ when less than 12" away, including close combat: nifty. It grants Hit and Run, but its initiative is still 2 and it carries a Flechette Dispersal Pod. The pod grants a free D6, Shredding, S4AP5 attack to models 6" away when the Y'vahra uses its special jetpack or Deep Strikes. Nothing crazy, but it's always fun to shred some infantry, and they don't have to be the same target as the main weapons either. Speaking of the special jetpack...

    Dat Jetpack. Delicious
    This is the Vectored Thrust Array. It allows the Y'vahra to make a special move every other turn. It moves like a Swooping Monstrous Creature (so basically anything between 12" and 24") so it can be in your opponent's face on turn 1! 

    Note: Currently, I'm interpreting this to mean that the suit can still Assault after making this special move. Moving like it is a swooping FMC does not make it an FMC, so it doesn't follow the same restrictions.

    Weapons

    Ah, the juicy part. 
    • First let's look at the Ionic Discharge Cannon (right arm). It is a 12" S8 AP3 Heavy 3, Blind weapon with a Haywire Burst special rule. Haywire Burst grants a Haywire hit to the target in addition to any regular hit from the weapon. So, if you hit a tank twice it takes two S8 hits and it takes two Haywire hits, so you can even threaten AV14! This weapon is a premier tank hunting weapon, and it makes good use of the Y'vahra's BS4. The only downside is that it doesn't match up very well with the second weapon. Blind could be your saving grace when dealing with counterattacks, but since you'll be targeting MEQ with the Y'vahra, I wouldn't bank too much on it.
    • The left-hand weapon is a Phased Plasma-Flamer. It is a 6" Torrent (14" total threat range), S6AP3 Heavy 1 weapon. Wow, what a marine killer! But wait, there's more. It can fire an alternative profile that makes it AP2, heavy 2, and Gets Hot! Oh my, if that doesn't toast every TEQ in range, I don't know what will... Gets Hot being the only downside, I can't see the regular profile being used very often. Note that when using Wall of Death for Overwatch, you will still only get d3 hits, not 2d3.
    These weapons are fantastic, but they do not mesh with each other particularly well unless your target is MEQ. If you decide to roast TEQ, then your IDC shots will not have very much effect. If you target enemy vehicles the PPF won't be doing much damage either. Unless it is an open-topped transport (No Escape indeed). Obviously MEQ will all melt to the Y'vahra, but then you may end up with some overkill.

    Something to note, this could work very well against an Imperial Knight. If you use the Swoop to get close, your opponent will almost certainly choose whatever arc it is facing for his Ion shield. The rest of your army can target the Knight and not have to worry about the shield, while your Y'vahra can just roast some infantry or some other nearby target.

    Nova Reactor

    These are the Nova Reactor abilities for the Y'vahra. Unlike the R'varna, a failed nova roll can be mitigated by the Stimulant Injector.
    • 3+ invulnerable in close combat
    • An extra D3 shots from the IDC
    • Can jump into Ongoing Reserves, even if it was in close combat!
    • Gains Jink and a 4+ cover save when Swooping/Thrusting as if it was moving Flat Out
    The 3+ isn't all that great, given the limitations, but if FW nerfs the shield generator as it is, then it will be a better option. Obviously, the 4th power was not updated for 7th edition. Currently, we'll have to check with our opponents to agree what this power grants. Powers 2 and 3 are going to be the most fun and the most used. 

    Support Systems

    I can see this making good use of a few of the support systems.
    • Stims are awesome (at least for now) and are just as great as on a regular Riptide. Just expensive
    • Velocity Tracker could be handy. The higher BS and the swoop movement could let you drop even the heavier fliers with ease. Those Haywire hits add up, even if they Jink
    • EWO would be fantastic if you are facing a Deep Strike army. It is shorter ranged, but that PPF will reliably roast more TEQ than the Ion Accelerator on a Riptide
    • The positional relay could have a place here, since the high mobility can put the relay in range of your opponent's table edge on turn 1. Add in some reserve manipulation and bring those Kroot and Stealth Suits directly behind the enemy on turn 2!
    • The CDS and ATS aren't that great, especially since they only affect the IDC and it only shoots 3 times.
    • Target Lock and DC are worthless, since you'll likely not want to take any drones at all. If you did take drones, I expect you'd take a single shield drone to try and get that high initiative for Hit and Run.

    Expected Changes

    These are only the first draft of experimental rules. Unlike the Imperial Knight variants, the new Tau toys have to go through years of being "unofficial" before they can be considered "40k approved." The R'varna is still technically experimental and there's no telling how long it will be before these models will receive official rules.
    Marine armies are the most prevalent armies in the game. Naturally, they will whine and cry and hate on anything that excels at killing them, and because there are more Marine players, the general outcry that FW will hear is that the Y'vahra needs to be nerfed...hard. These are things that would not surprise me if they changed, and I would expect the point cost to stay the same as well.
    • Most likely, they will want the PPF to be reduced to AP4/AP3 with a bigger penalty for using the second profile
    • They will want there to be some sort of penalty for using the escape thrust (free attacks?)
    • Stims may not work anymore on failed Nova rolls
    • BS reduced to 3
    • The shield generator could be changed back to a regular Riptide generator


    Conclusion

    This model is a beauty. It looks fantastic and if I had the money I would only run this model in place of regular Riptides. The Jetpack is what sold me on it. Gorgeous.
    The rules look like a ton of fun too. The extreme mobility and the short range of its weapons make this thing a dangerous toy to be playing with, for everyone involved. I vastly prefer its play style to the R'varna's, even if I do love the R'varna model. 
    People think that Riptides are so hard to kill, but in Rapid Fire range (or close combat) they go down easier than you'd think, and this thing basically HAS to operate in Rapid Fire and charge range of its enemies. If you want it to survive more than a couple turns you'll have to be pretty careful with how you play it.

    I haven't playtested it, but I feel like it is probably actually pretty balanced as it is. I hope they don't nerf it very much, if at all. I'm going to email Forgeworld, imploring them to be gentle if they decide to nerf it. Maybe they'll listen if we make a good case for it.

    What do you all think of the new Y'vahra? Do you prefer the long range pounding the R'varna dishes out? What do you think they'll nerf?

    Forgeworld Update: (Expands on Skyler's Announcement)

    $
    0
    0

    For those who missed two of the biggest things to happen on Forgeworld lately -at least as far as the Tau are concerned, the Kroot are gone from the FW site, and there is a new Battlesuit for us Tau lovers.

    I am not sure why the Kroot Knarlocs and Greater Knarlocs were taken down a couple of months ago, but they are indeed gone.  I badly want a baggage Knarloc, so if anyone wants to sell or trade one…

    I have a sneaking suspicion that the long rumored Kroot Supplement may have something to do with it.  At least I hope it does.  It would be nice if the Knarlocs moved over to plastic and were in the supplement.  But this is just wishful thinking for now.  I will keep hoping.

    As for the Battlesuit, Holy Shit!  Have you seen this thing yet?  It is a Riptide class monster that sits in a fast attack slot.  WS2 kinda sucks, but BS4 isn’t so bad.  

    Plus, it can leave the battlefield (even when engaged in close combat) to go into ongoing reserves, then deepstrike next turn.  It can jump like mad, and can also jink when thrusting or swooping.  Swooping on a Battlesuit?  Jinking?  

    Yep!  

    And dropping flechette dispersal pods along the way.  Like the postman delivering bad news.

    I like it.  I love it.  I’ve gotta have it!  

    I will let you know.

    £72... that's like $115.  About the same as a wraithknight...

    By the way, this sets the stage for large Battlesuits in just about EVERY slot of the Force Organization Chart, except troops.  

    Imagine Farsight and O’vesa in command, three Riptides in Elite, three R’varnas in Heavy, and three Y’Vahra in Fast Attack.  Jam up your troop slots with Crisis teams and you have one hell of a strike force.  

    Big bouncing battlesuit army, nice and clean.  

    Check it out here.

    Oh my God, I need a shower.

    Keep your fingers crossed on the Kroot.

    I play Tau.

    Tactica: Cadre Fireblade

    $
    0
    0

    I am going to break away from the vehicles and units to focus on the new HQ option: The Cadre Fireblade. This is the Sergeant Johnson of all Firewarriors and he brings some cool synergy to Tau lists.

    Description

    The Cadre Fireblade is a Firewarrior veteran that has declined battlesuit advancement and stays with his infantry buddies. He is a master of the gunline and it shows in his special rules.
    He is a cheap HQ option for those that don't want to field an extra VP in the form of an Ethereal. He costs 10 points more than an Ethereal and similarly has very few equipment options. Indeed, his only option is how many drones to take, if any.
    He carries a Firewarrior's standard equipment, with the addition of a Markerlight. His statline is similar to a Firewarrior Shas'ui, but he has more wounds and a Ballistic Skill of 5! He also has improved close combat ability, but it is still abysmal.
    His special rules are what make him worth taking. He has the "Split Fire" ability and "Volley Fire" (more on those later) which make him a pretty decent support character.

    Battlefield Role

    As stated above, the Cadre Fireblade is taken to support your army. He will most always be accompanying a large Firewarrior squad equipped with Pulse Rifles. This doesn't mean he cannot support other units, it just means that his comfort zone is with his Firewarrior buds. At the end of the day, if you aren't taking him for Volley Fire, then you aren't using him correctly.

    While accompanying this FW squad, and granting it Volley Fire, he is free to do other things.
    • He can contribute his own BS5 firepower to the group's
    • He can Split Fire and shoot his Markerlight (or Rifle) at another target. This works for emplacement weapons as well
    • He can Split Fire and have someone in the squad throw a Photon Grenade at some other target (Imperial Knight maybe?)

    Loadout

    The Fireblade has a fixed set of wargear and no options to change it. When you think of him in terms of an special character upgrade for a Firewarrior squad, he actually seems pretty cheap. A FW Shas'ui, carrying a Target Lock (Split Fire) and a Markerlight is over half the cost of a Fireblade, so you are really paying just over 25 points to grant "Volley Fire" to a squad of Firewarriors.
    Since Drones don't often mesh well with Firewarriors, the Fireblade won't be bringing them. Some players subscribe to the Markerlight Cascade method which would normally require spreading Marker Drones throughout your infantry squads, but this squad should really be the last one to fire, so it won't be needing those drones.

    Tactics

    A simple support HQ like this makes for straightforward uses. Place him in a Firewarrior Squad to increase their damage potential. There are a few things to note about maximizing his use though:
    • The more Firewarriors in the squad, the better. Bring 12 if you can
    • Use Pulse Rifles. His ability requires the squad to stay put, so you'll need the range if you want to hit stuff before it is too late. A full salvo of 26 shots at 30" is a great alpha strike tool against enemy infantry.
    • Don't forget Split Fire. He can fire his BS5 Marker Light at a different target. Perfect for marking a tank or heavy infantry when you don't want to shoot Pulse Rifles at them
    • Plant him on an objective, in cover, somewhere safe. He cannot move if you want that extra shot, so if he is already on a defensible objective, then he has no reason to move anyways
    • Don't be afraid to move. Objectives can be fleeting and sometimes it's better to keep your distance and live, then to fire an extra shot and be dead the next turn in assault. 3 shots each at 15" though...
    • His ability does not work during Overwatch, so don't count on it.

    Synergies, Lists, & Combos

    Obviously, he is meant to accompany Pulse Rifle Firewarriors. Gunlines benefit more from an Ethereal, but the Cadre Fireblade performs well in smaller firebase groups. Below is an example of a small firebase led by a Fireblade.

    • Aegis Defense Line with QuadCannon
    • Cadre Fireblade (mans QuadCannon)
    • 12 Firewarriors
    • 3 Broadsides
    This group works well together. The Broadsides can engage enemy transports and lighter vehicles, as well as provide Twin-Linked Overwatch fire when the enemy closes in. The Firewarriors clear out dismounted enemy infantry or blobs. The Fireblade can engage enemy aircraft or Skimmers with his excellent Ballistic Skill and Split Fire ability, or use his Markerlight to help out the Broadsides. The whole group costs around 500 points, so it is pretty cheap too.

    He makes an excellent HQ option for games up to 1000 points, where it can be hard to make room for all the fun toys you want on an XV8 Commander. Unlike other budget HQ's, that are essentially placeholders, the Cadre Fireblade brings a lot of support to your army.

    Conclusion

    The Cadre Fireblade is one of the "budget" HQ's of the Tau codex, with Ethereals being the other. He has a focused skillset and turns a single FW squad into a powerful firebase. He is easy to fit into lists and will almost always end up being worth it. The only list that he should never be included in, is a fully mechanized cadre.
    When compared to the budget HQ's of other codices, he stands above the rest as a powerful support character that brings an excellent ability to the table. This ability is useful no matter what size of game you are playing.


    Thanks for reading! Post your greatest Cadre Fireblade moments below!
    -Skyler

    Local Tourney List: 1500 points

    $
    0
    0

    1500pt Local Tournament List

    My area was fortunate enough to have a small gaming shop start up a few months ago. As a proper welcome, I am running our first 40k tournament to help get a bit more interest going. It feels so good to be playing a game and have young folks come in with wonder in their eyes (woah, what is THIS game?)

    Though I am basically running the tourney, we have few players, so I'll be participating. Plus I love playing. Here is the list that I'll be bringing in only a couple short weeks.


    The List


    Farsight Enclaves Combined Arms Detachment

    • Commander: Plasma Rifle, Fusion Blades, Stims, Talisman of Moloch
    • Crisis Team (x3 Shas'Ui): x6 Plasma Rifle
    • Crisis Team (x3 Shas'Ui): x6 Missile Pods, x3 Target Locks, x6 Marker Drones
    • Riptide: Ion Accelerator, TL Fusion Blaster, Earth Caste Pilot Array, Stims, Early Warning Override
    • Sniper Drone Team: x3 Sniper Drones, x3 Firesight Marksmen

    Tau Empire Allied Detachment

    • Commander: Iridium Armour, Puretide Engram Neurochip, Command&Control Node, Multi-Spectrum Sensor Suite, Onager Gauntlet, Neuroweb System Jammer, Drone Controller
    • Stealth Team (x6 Shas'Ui): x6 Burst Cannon
    • Kroot (x10): Sniper Rounds
    • Broadside Team (x2 Shas'Ui): x2 High Yield Missile Pod, x2 Smart Missile System, x2 Early Warning Override

    How it fits together...

    • Deathrain-D plus allied Commander: expensive, and a large footprint. The commander buffs the squad like crazy, making it my super Alpha Strike squad. Pretty much whatever it shoots at, it will kill, and the highly accurate markerlights will help my followup units kill something else.
    • Burning Eye-D plus enclaves Commander: high profile target with lots of AP2 and warlord. Will likely hide in the backfield until they are needed, or Deep Strike if the board is open enough. With a few markerlight hits, this unit becomes mega-deadly. This is my mid-game heavy hitter, that targets my opponent's costly units after they've been committed.
    • Riptide, Broadsides, SDT: my army's solid anchor. They do a little bit of everything and the Riptide can take a beating. The EWO gives me some decent Deep Strike protection (plus the commander's NSJ) and will be the bait against assault oriented armies
    • Stealths and Kroot: they fulfil the same role, one is just much more expensive. Outflanking and hitting exposed enemy infantry or vehicles from the flank will be their main goal, but against a horde army they may serve as an assault screen. Stealths end up as my MVP's all the time and I never even give them any markerlight support, so I can't wait to try them out with even a single marker hit.

    Thoughts

    This list is a bit different for me. I've never fielded Kroot nor SDT's and I've only played one game with Broadsides. I also have never actually used a true Support'O either. These things are new, but I'm hoping that my overall experience with the codex will make up the deficit.

    Something that I really like about this list, is that I've worked redundancy into the list without duplicating units. AP2 firepower from Burning Eyes and the Riptide, Missile fire from the Deathrains and Broadsides, Markerlights from the Deathrains and SDT, anti-infantry from the Stealths and the Kroot, etc. 

    You will notice that I have elected to forego dedicated anti-air, as well as very little anti-AV14. This is partly due to my area, as I rarely see fliers (aside from a Storm Raven) and so far have only faced Leman Russes for AV14. There are always Land Raider and Monolith dangers, but I am hoping to outmanoeuvre those dangers. 

    My opponents so far will be Astra Militarum, Grey Knights, and Space Wolves. Tyranids, Necrons, Tau, Chaos Space Marines, Daemons are also possibilities, but not confirmed. My main worry is Astra Militarum with their tough tanks, cheap psykers, and massive infantry blobs. Pretty much anything with a lot of cheap models will be hard for my small elite force to deal with, and AM has the range. Executioner Leman Russes, in particular, will likely be something I'll face, and they will be absolute murder on my battlesuits.

    This tournament is shaping up to be a fairly competitive one, as it is the first tournament we've been able to hold at this game store. I'm very excited to give this list a try, as I haven't participated in a tournament since I won the local Feast of Blades qualifier back in Idaho.

    Let me know what you think of the list. I'm very excited to get it on the table, but I've still got lots of stuff to do for the tournament! Time to whip up some cardboard terrain and some purity seal fridge magnets as prizes...

    Local Tournament Results

    $
    0
    0

    A little earlier this month I posted up the 1500 point army list that I'd be taking to a local tournament. Those that checked it out might be interested in seeing how it performed. Instead of separate batreps, I'll put up a summary of each game in this post, to give you an idea of what worked and what didn't.


    Disclaimer

    I wrote this list early in the planning stages of the tournament (I planned and ran the tournament myself) and submitted it to one of the players before I had received any of the other players' lists for pre-approval. This was to show, in good faith, that I wasn't tailoring my list as I checked out the lists coming in.
    When I wrote the list, we estimated between 6-8 players would come; mostly regulars that I'd played before. However, in the last week before the tournament, We had an explosion of interest from a nearby university, bringing our total to 15 players!! I had left the format pretty much wide open, only disallowing Forgeworld, so this made for some cheesy lists among the more competitive players. Even so, everyone had tons of fun and it was a smashing success for our first tournament. We even got some card players interested in playing.

    Note: Transcendent C'tan is OP and shouldn't be in Escalation.

    Game 1-Grey Knights: Emperor's Will

    Bottom of Turn 2
    This player and I have battled many times, and it is always fun. Grey Knights are tough, and he brought a pretty nasty list:
    • Librarian (Invisibility), Paladins, Termy Squad, Interceptor Squad, Storm Raven, 2x Dread Knights, Aegis+comms
    A couple things didn't go my way that would have made a huge difference. For example, my Intercepting Large AP2 Blast scattered wide, and from then on the unit was Invisible. I failed to finish of the first Dreadknight turn 1 because I directed some of my firepower at the Invisible Paladins (moronic. I don't know what I was thinking). I left my Stealth Suits where they were, instead of re-positioning them.
    Otherwise, the game was actually pretty close. My Riptide held up both units of Terminators for 3 rounds of close combat while my army finished off his Dreadknights. Unfortunately, by that time I didn't have much left to fight back with. The Storm Raven kept picking off my battlesuits with instakill weapons, including my Warlord. He scored 6 VP's to my 1. In another turn I probably would have been able to increase that to 4 VP's, but it wouldn't have won me the game. My opponent took 3rd place overall, losing badly to the Transcendent C'tan player in the final round. He periled and killed his own Librarian before the Necron player even got a turn. Serves him right, since he didn't peril a once in our entire game!

    Game 2-White Scars-The Scouring

    Just starting his first movement
    My first encounter with a Biker army and an Imperial Knight! The list was pretty simple:
    • Khan+6 bikes+attack bike, 7 bikes+attack bike, 7 bikes+attack bike, Thunderfire Cannon, Storm Talon, Imperial Knight Errant
    The mobility of this list was absurd. He was literally inches away from some of my units at the end of his first movement. I lost my warlord and plasma first turn to S8 melta fire, but in return I wiped out his warlord unit.
    Halfway through my second turn
    This game went...ok. I hadn't counted on any Imperial Knights (none of the players I knew owned one) so I had few things that could hurt it. My warlord managed to get the Tank Hunter special rule, and had decent odds of killing it in CC, but he died too soon to give it a try. My underestimation of biker army firepower really shot me in the foot. My opponent also managed a 10" charge through cover (12") with his Knight on turn 2, so the Riptide only shot once the whole game.
    Can't touch this! He eventually gave up and sent the Imperial Knight in to kill him
    My Outflanking Kroot and Stealth Suits did their job well, and even brought down the Storm Talon with rending sniper shots! By the end of the game I had a single stealth suit on the board, hidden deep in the enemy deployment zone while my opponent had most of a bike squad and the Knight stranded in my own zone. Final score was 7 VP's to 5. 

    Game 3-Tyranids-Purge the Alien

    End of my first turn, most of the Genestealers are now gone
    Due to how the scoring ended up, I was now 13th out of 14 in the tournament (one player dropped out). This was the final round and I was up against one of the Tyranid players. His list showed just how "green" he was:
    • Swarmlord, 2x10 Devilgaunts, 2x10 Genestealers, Brood lord, Carnifex, 3x Warriors, 2x Zoanthropes
    You might say: "how on earth is that 1500 points?" He loaded up on tons of bio-upgrades that most people wouldn't take. With all the upgrades, he essentially gave himself a handicap, as if using Genestealers wasn't a handicap enough...
    This game went pretty much as expected. I eliminated his entire army and only lost my Plasma suits in return. They got too close to some Termagaunts and got wasted by volume of fire. To be fair, he was under the impression Devourers are S5, so that might have had something to do with it.
    I won 12 VP's to 1. This pushed me up to 9th overall for the tournament.

    Summary

    So, what units did well and what units didn't? To be fair, the units all had their uses from game to game. In one game they would under perform, but they would do better the next game. 
    • The Sniper Drone team was handy for a couple guaranteed marker hits, and helped my Plasma team cut down a Dreadknight while the marker drones were occupied in combat with the other. It also attracted more attention than I thought it would, so it doubled as a fire magnet against opponents unfamiliar with it. I'll take this unit over pathfinders any day.
    • My Warlord was underwhelming because he kept getting killed by S8 weaponry. I think that he actually never got to roll a regular armour save, and only failed 2 invulnerable saves all day (each one insta-killing him). Had I played him more defensively he would have done better I think. The Fusion Blades were nice to have around, killing a Dreadknight with lots of S8 AP1 hits, though it only worked because my Support'O was able to accept the Dreadknight's challenge.
    • The Support'O or Buffmander really didn't help me out that much. The only time I faced a vehicle was the Imperial Knight, and it got into combat with a lucky charge before I had a chance to shoot it. Had I faced just about any other army present, he may have been a better performer. 
    • The Riptide performed admirably. It killed some stuff, but it was really just there to tie stuff up and buy me time. I forgot to Nova charge a couple times, but they weren't critical times.
    • Kroot, Stealths, Broadsides, XV8's all performed as expected.
    So, I'll be making some changes to the list but overall I think I just need more practice with it. I had the tools I needed, I just misused them sometimes.

    Thanks for reading! 

    Farsight's Commander Team: The Eight

    $
    0
    0
    This is not a full blown tactica article, it is more of my own musings on the uses of The Eight. I think that their usefulness has lessened since the arrival of 7th edition, and due to some oversights in the Farsight supplement itself. Let's take a look at these guys and see what they can do for us on the tabletop!

    The Eight

    EYIG has mentioned these boys in his REVIEW of the Farisight Enclaves Supplement, but this will go a bit more in depth. For those who do not know, The Eight are commander Farsight's top commanders. In an FSE detachment that includes Farsight, they can take the place of his regular 7-man bodyguard team. Most of them are your standard Tau Commander with very specific wargear, then you have a Broadside and a Riptide. Let's break down each member:

    Farsight

    If you want to have any of the commander team, you have to take Farsight. For some playstyles, this is a drawback, but for many FSE players he fits nicely. Even in an un-tailored list, Farsight will have his uses. He has boosted combat stats, a plasma rifle, shield generator, and the Dawn Blade. The Dawn Blade makes Farsight a fantastic tank hunter, and makes him at least somewhat effective at engaging 3+ and 2+ armour save models. Farsight also automatically has the Through Boldness, Victory warlord trait, which is usually unavailable to FSE warlords and is incredibly potent.

    Brightsword

    A tau commander with an Advanced Targeting System, Fusion Blades, Stims, and 1 Shield Drone (Warscaper). Technically, nothing about this character is unavailable to a regular FSE commander. In general, if you want Fusion Blades or a Warscaper Drone, just take a regular commander so that you can outfit him exactly as you'd like. He can be even better than Farsight at hunting vehicles, and is a bit deadlier against elite infantry thanks to his S8 close combat weapon. 

    Arra'kon

    A commander with Plasma Rifle, Airburst Frag Projector, Cyclic Ion Blaster, Counterfire Defense System, Repulsor Impact Field, and 2 Gun Drones. Nothing special here except for the Repulsor Impact Field. This signature system is underwhelming so the only reason to include him would be to add more wounds to your group at a very high premium. Of all the 8, he is the least interesting to me, since his equipment won't affect your Overwatch that much, and it won't be enough to deter your opponent from charging you.

    Bravestorm

    A commander with Plasma Rifle, Flamer, Shield Gen, Onager Gauntlet, Stims, Iridium Armour, and 2 Gun Drones. Now we are talking! He has the O'mortal setup, which is pretty popular and is very effective for soaking up damage that would otherwise obliterate your crisis suits. Whenever I consider the Eight, Bravestorm is usually the second member I add into the list. A tanky commander like this will always be useful in Farsight Armies, due to their low model count. 

    Sha'vastos

    Commander with Plasma Rifle, Flamer, Shield Gen, Vectored Retro-thrusters, Puretide Engram Neurochip, and 2 Gun Drones. He is the only way to include the amazing PEN in an FSE detachment. His equipment makes him suitable as a contributing member of a larger unit, like a Farsight Bomb, but you wouldn't normally want him for anything else. The PEN is great, but often players want to have the PEN, CCN, and M3S all on the same model to streamline things. Besides, the Commander Team will likely break into multiple units during the game, reducing the effectiveness of the PEN.

    Torchstar

    Commander with 2 Flamers, Drone Controller, Target Lock, Neuroweb System Jammer, Multi-spectrum Sensor Suite, and 2 Marker Drones. The M3S is another of the signature systems usually unavailable to FSE, however it isn't all that great in the Commander Bomb. Many of the commanders carry a weapon that Ignores Cover already, so this equipment is only benefiting the one other weapon for the group. She'll likely just shoot her Flamers instead. The marker drones will likely be wasting marker hits, but the Drone Controller benefits the gun drones accompanying the other commanders. The NSJ is a nice addition as well, since it can help protect any Tau unit against large quantities of shooting from a single target, provided Torchstar is nearby as well.

    O'vesa

    A Riptide with Ion Accelerator, TL Fusion Blaster, Stims, Early Warning Override, Earth Case Pilot Array, and 2 Shielded Missile Drones. Here is where it gets interesting: he is an Independent Character! He is also well equipped for his role, without unnecessary equipment. Like Bravestorm, he can act as an incredible Tank for his unit, with the added bonus that any unit he joins that has 3 members or less will be considered Toughness 6! O'vesa is probably my second character pick, as he brings something truly unique to the army. This is also a way to get 4 Riptides into an army. The only drawback is that now he can't be joined by Kingfishers or other independent Characters. Like Bravestorm, a tanky model that can protect your few crisis suits can be invaluable in an FSE detachment. 

    Ob'lotai 9-0

    A Broadside Shas'vre with TL High Yield Missile Pod, TL Smart Missile System, Seeker Missile, Velocity Tracker, and 2 Missile Drones. Like O'vesa, this guy (who is actually an AI imprinted from the original Ob'lotai) can join units he normally would not be able to. His lack of mobility limits his realistic options to other Broadsides and dismounted infantry units. While not spectacular, he can be a fun way to bolster your existing XV88's with an IC to help with Look Out Sir rolls. An interesting combination is if you place him with a unit of Firewarriors and a Cadre Fireblade, in cover. Both need to stay put in order to shoot effectively, and the Fireblade's Split Fire special rule acts like a Target Lock on Ob'lotai 9-0. So, he can tank wounds for the Firewarriors with his 2+ armour save, Look Out Sir other wounds way, and all while being able to fire on other targets, like Flyers.

    The Eight vary in cost, and the entire team costs just under 1500 points. Yowza!

    How to Field Them

    There are two main ways that you can include The Eight in your army: as a Farsight Commander Bomb or as support characters for the rest of your army.

    Farsight Bomb

    A Commander Bomb is going to work differently than a regular Farsight Bomb. First, it is hella expensive. Second, it will need to split into different groups after arrival. So, you'll be playing this deathstar in larger games, and you'll be making lots of quick decisions about who goes with who to accomplish what task and how. This is more difficult to master than a regular Deathstar, where you only have to decide where to move it (the crisis bodyguard weapon loadouts basically choose their targets for you) and how you can deny your opponent points.
    A Commander Bomb is going to run a bit over 1050 points to start. From there you have some options. You can add Shadowsun and some bodyguards (over 400 points), another FSE commander, an Allied  Support'O/Kingfisher, or even a Stealth Suit team. The cheapest, most efficient option would be to add a regular Troop crisis team with your choice of equipment and drones.
    Your opponent will likely be trying to play to the mission, hoping you wont be able to kill enough units with your one big unit (the usual approach against a Deathstar). So in order to win with this unit you need to be able to score various objectives each turn. Luckily, you can adapt your unit size at will, splitting or merging members together to accomplish various tasks at any given time. As a whole, the unit is nigh unkillable and basically impossible to tarpit, but it can only be in one place at a time and kill only one unit at a time (maybe 2 if the unit they attach to has target locks). When it breaks into smaller groups your opponent will have to choose what poses the greatest threat, while your various units bound around doing their thing. Even reduced to 3 separate groups, each mini-star is formidable (these are commanders we are talking about).
    Let's play "Which squad will I put Farsight in next!"
    The only thing that keeps this maneuvre from being broken and OP, is that you cannot join IC's to a unit unless it is the movement phase. Otherwise they could hop around blasting stuff, then just hop right back together into a huge unkillable, uncatchable deathstar. Next edition baby...

    Commanders in Squads

    The second way to field them is by selection and in pieces. For example, you could take Bravestorm and O'vesa to tank for a couple of your Crisis teams, while Farsight uses Deep Strike to deliver a mini-bomb of regular crisis suits. Or you could put Farsight and Brightsword together to act as an assault deterrent in your deployment zone, while O'blotai and O'vesa tank for your Broadsides. Some players like to use Torchstar with their Deathrains.
    This has a smaller point impact on your list and is usually for FSE lists that aren't going to be using a large Farsight Bomb anyways. Even so, these characters aren't cheap so you won't be using any of the commander team in low-to-mid point levels.

    Summary

    Keep in mind that while dropping all these characters as a single Commander Bomb is an option, you can't approach it like a regular Deathstar. If you do you will get outmaneuvered and lose. The key here is where these commanders go after they drop. They'll almost certainly have to break into different groups to get their jobs done. Like all units, they are expendable, so sometimes they will need to make the ultimate sacrifice for the Greater Good. 6+ independent characters running amok in your opponent's backfield should cause quite a bit of mayhem. The question is whether it can cause enough mayhem to win you the game.
    If you want to play an actual Deathstar, it is better to take a regular 7-man bodyguard for Farsight. It can operate as a single unit while targeting multiple threats and staying hard to kill. A regular Farsight bomb runs around 800 points before you add in Shadowsun or an FSE commander.


    Thanks for reading!
    So what do you think of the Eight? Would you field them all together, even just for fun? Would you take them piecemeal? Would you take them at all? I know that I am eager to try out O'vesa tanking for my Deathrains, and a deathstar of IC's sounds like fun for a casual game.

    Merry Christmas from Warhammer Tau!

    $
    0
    0
    Short and sweet: Merry Christmas!
    Thanks for reading, especially since lately our authors have been very busy with RL!

    Battle Report: Tau/Necrons vs. Astra Militarum/Orks

    $
    0
    0

    Tau/Necrons vs. Astra Militarum/Orks

    This was actually a practice match for an upcoming doubles tournament I am helping throw at our FLGS. The restrictions are pretty simple: 1000 points per army, Battleforged. This was a very fun match that came right down to the wire.


    The Armies

    Necrons

    • Overloard with resurrection orb, scythe, mindshackle scarabs, command barge, and the 2+/3++ wargear
    • 15 Gauss Warriors in a Night Scythe
    • 5 Tesla Immortals
    • 3 Wraiths 
    • Doomsday Ark
    He is relatively new to the game, so he was still finding out what units he liked and what units were good. Not a terrible list for 1000 points, and it turned out to have all the pieces we needed to win.

    Tau (Farsight Enclaves)

    • Commander with Drone Controller, Fusion Blades, Stims, Talisman of Arthos Molach, and 2 marker drones
    • Riptide with Ion Accelerator, Fusion Blaster, Stims, Earth Caste Array, Early Warning Override
    • 3 Crisis suits with two Missile Pods (Deathrain-D)
    • 2 Crisis suits with twin-linked Missile Pods (Deathrain)
    • 2 Crisis suits with twin-linked Missile Pods (Deathrain)
    • 1 Crisis suit with two Flamers (Heatwave-D)
    • 1 Crisis suite with two Flamers (Heatwave-D)
    • Officio Assassinorum Detachment: Culexus
    My own list was pretty straightforward. MSU for nabbing Maelstrom objectives, with some fun characters thrown in. The Culexus was included for dealing with Invisibility during the tournament.

    Astra Militarum

    • Pask in Punisher with Multi-melta sponsons, Executioner with Plasma cannon sponsons
    • Veteran squad
    • Veteran squad with carapace armour, 3 plasma guns in Chimera
    • Veteran squad with carapace armour, 3 melta guns in Chimera
    • Wyvern
    • Aegis Defense Line with Quadgun
    A scaled down list of his usual: Mechanized infantry, supported by his Warlord tank combo and stationary elements.

    Orks

    • Weirdboy, level 2
    • Warboss with Lucky Stick
    • 3x Big Mek (2 with kustom force fields and one with a shock attack gun)
    • 1x Mek
    • 2x Painboy
    • 2 large mobs of boyz (don't recall the exact number)
    • 4 Mek Gunz with 2 upgraded to Smashas, and extra gretchin
    I have to confess that I don't actually remember much about the list. He was using a special formation that gave him lots of characters to put into his Boyz mobs (3 in one and 4 in the other). So I've left the characters out of the batrep diagrams completely.

    The Scenario

    The little fences are actually his Aegis line
    Mission: Maelstrom of War #2
    Deployment: Dawn of War
    Night Fight: No
    First Turn: Orks/AM
    Warlord Traits: Necron Overlord could re-roll the D3 result for take-and-hold cards. Pask had his special trait.

    Disclaimer: The diagrams may not always match up exactly with the pictures. Things get forgotten or moved around in the mind. Just take it in stride and keep reading.

    Deployment

    They set up in a big line. They had lots of models so they didn't have much choice. The orks took the left side and the AM took the right, sharing their Aegis with the mek guns.
    I took the lead and laid out our plan to my partner. We had superior mobility, so I would deploy my sweet units to draw his orks straight across, while the rest of our forces would focus on the AM and mek guns on the other side of the board. I infiltrated the Assassin into a large black building, as close as I could get him, hoping he would go unnoticed. I chose to Deep Strike my two monat Heatwave-D's.

    AM/Orks Turn 1

    The orks ran straight for my units, while the tanks negotiated their way around the terrain. The vets stayed in their metal boxes, waiting for their chance to try their own brand of Fish of Fury.

    Despite lots of long range shooting from the Wyvern, mek guns, and the Leman Russes, they were only able to kill an Immortal and a Wraith, wound a Crisis suit and wound another Wraith. Wraiths had a nasty reputation in our area, even though these ones weren't even upgraded, so they were focusing pretty hard on them.

    Tau/Necron Turn 1

    Based on our starting Maelstrom card, we needed to hold 3 objectives, so I moved up to claim my closest. The rest of the army advanced, with the Wraiths catching up to my assassin in the central ruins. 
    The Doomsday Ark annihilated a Chimera, winning us First Blood. His other Necrons targeted the now-disembarked Meltavets, killing a couple of them. My own shooting was fairly ineffective, killing just a few of the boyz. The Assassin ran right out into the middle of the board, daring the entire army to shoot at him.
    "Who will fight me?"
    In the assault phase, I jumped some of my units back, but had to leave my Deathrain-D's in charge range to claim the objective. It was a shame, but this game is all about objectives, and this would get us D3 re-rollable points and generate another Maelstrom card.
    We scored our objective, but even with a re-roll we only got one VP for it. Boo! What a waste of my unit and our warlord trait! At least we had First Blood, and our opponents hadn't scored their objective yet.
    The table going into turn 2

    AM/Orks Turn 2

    The plasmavets disembarked and they all made their way for the Overlord. The Tanks shuffled some more, trying to get line of sight on the Wraiths hidden in the ruins.The orks moved up as well, announcing their Waaagh! and easily getting into combat with my poor Deathrain-D's.
    PunisherPask+Executioner failed to kill the wraiths completely. One escaped with a single wound! Afterwards, he popped smoke, so it would be hard to shoot his tanks. Everything else targeted various things, but didn't accomplish much. The mek guns seemed to vary in their capability, destroying things one turn and completely whiffing the next. The special-weapon-vets all shot at the Necron Overlord, getting a couple wounds/HP. The vets manning the quad gun fired at my approaching assassin, but he dodged the las rounds with his lightning reflexes!
    Nobody? Fine.
    In combat, the crisis suits were mulched by the orks, which were now poised to eat up my Riptide and Commander as well.
    Please excuse the fuzziness

    Tau/Necron Turn 2

    The table partway through our turn 2
    Both of my crisis suits arrived, but the Night Scythe did not. Perhaps for the best, since the Quadgun was still manned. He attempted to intercept one of my Heatwaves, but I passed my armour save. So far the plan was technically working: I'd successfully drawn an ork mob to my side of the table, though it was a bit quicker than I'd planned. I needed to keep the other ork mob interested in that side of the board, so I dropped my monats around the mob that had just finished creaming my poor Deathrain-D's. They both scattered, but did not mishap.
    I moved my units further to the right, getting ready to make a break for it. The Wraiths and Assassin both prepared to assault the vets manning the Quadgun, intending to make it safe for the Night Scythe to arrived. I'd forgotten the psychic phase, but they let me use my assassin's Animus during the shooting phase. I killed a couple more meltavets, which reduced them to only a couple members. They failed their morale check and fell back towards the Aegis. The Doomsday Ark fired at the Executioner but did nothing. My crisis suits fired at the Wyvern and got one shot through to strip a hull point. 
    Should we help? Naw, he's probably fine...
    "If I ever get to swing my Scythe, you will be sorry!"
    My teammate, thinking his Overlord would easily kill the weak plasmavets, charged them and killed one with Hammer of Wrath. Their higher initiative and Krak grenades killed the Overlord before he could even attack. Thankfully, he passed his resurrection roll and piled back into combat (Note: we handled this combat incorrectly. Chariots, characters, challenges, consolidations, and resurrection protocols all made it a nightmare to figure out so we winged it) .
    Doomed Vets. DOOMED
    My Assassin took a wound during Overwatch, killed a few Vets, won the combat, and swept the unit, consolidating into the nearby ruins. My suits made their thrust moves and I positioned my commander to screen the incoming horde from my Riptide. My newly arrived Heatwaves were able to reach an objective and contest another. 

    AM/Orks Turn 3

    The meltavets continued running towards the edge of the board, The orks prepared to assault the contesting Heatwave and my Commander.
    The Weirdboy hadn't done much up until now, casting powers that either didn't kill anything or failed to manifest. At this point, he periled and rolled a 6. Mercifully, he failed the leadership check and lost a wound instead of becoming a mini-monstrous-creature.
    My assassin, sneaking through the shadows...
    The Wyvern tried to kill the Wraith, but my partner passed his invulnerable saves. One of my crisis teams was wiped out by the Executioner and split fire from Pask killed the last Wraith. Ork shooting was much worse, the mek guns failed to kill my Heatwave in the open (they didn't have any good targets to shoot), and both ork mobs failed to kill their assault targets with shooting.
    He just wanted to torch some Orks before he died
    The orks charged my units, losing a few orks to Overwatch (dual Flamers baby!). My commander bravely challenged the horde, cutting the accepting mek (I was hoping for the Weirdboy) to pieces before the rest of the orks finished him and his drones off. Obviously the lone Heatwave died instantly and the Necron overlord went down to Krak grenades again. But...he resurrected again! My teammate was pretty bummed about his awesome chariot getting bogged down by some veterans, but at least he'd "survived" 2 rounds of combat when he didn't even get to hit back.


    Tau/Necron Turn 3

    Mercifully, the Night Scythe arrived from reserves. Looking at our objectives, we needed to hold 3 different objectives for 4 points. 2 points were currently held by an ork mob and a Chimera; the other was in range of my lone Heatwave now that the Orks had run off it to kill my commander. I Nova Charged my Riptide's jetpack to try and make my escape. Up until this point I was letting my partner make most of his own choices, but this time I instructed him to bring the Night Scythe on and disembark his warriors within 3" of the objective held by an ork mob. I moved my Riptide away, moved my crisis suits toward the Chimera, and got my Assassin into position to kill the mek guns.
    My Assassin used his psychic phase to finish off the fleeing meltavets, just to be sure they didn't rally.
    I ran my Riptide and moved the Heatwave onto an objective. Then I had my crisis suits shoot the Chimera (glanced it once). The Night Scythe killed just enough Orks that the mob was no longer holding the center objective. My partner really wanted to shoot up the Ork mob with his warriors, confident that he could kill it. I eventually convinced him that we needed to try and kill their warlord, so he fired at the nearby PunisherPask. Despite lots of shots and above average hits, he only got two glances. It's a good thing that I had decent luck with my rolls this game, because my partner's seemed to have abandoned him.
    The Riptide then activated its Nova Charged thrusters and jetted out of reach. My remaining Heatwave skipped on down to the objective recently vacated by the blood thirsty Ork mob. My crisis team charged the Chimera and kicked it into scrap, clearing the last objective that we needed. The plasmavets planted their Krak grenades on the Overlord again. They must have done it right this time because my partner finally failed his 4+ resurrection roll. My assassin charged the mek guns and challenged the Big Mek to single combat. He promptly ripped him and a couple gretchin to pieces and then chased the remaining gretchin from the board.

    We scored all 4 of our Maelstrom cards that turn, but I believe that this turn they also scored 3 VP's with a good D3 roll.

    AM/Orks Turn 4

    The plasmavets moved toward my crisis suits sitting on the right-hand objective. The lower ork mobs moved left towards my Heatwave since they now needed that objective, while the other ork mob prepared to erase the necron warriors. The Leman Russes moved to deal with the Necron warriors as well.
    Both ork mobs ran toward their destinations, but both only ran 1". I guess they were tired from all the Waaaghing earlier. The Wyvern had little else to fire at, so it shot at the Immortals hiding behind my newly arrived Riptide, killing them all. PunisherPask then split fire with the Executioner. The Executioner fired at the Necron warriors, killing them all (close packed necrons make for good blast targets). Pask fired at the Night Scythe, which Jinked and escaped with a single hull point.
    The orks couldn't charge because they'd already used their Waaagh and ran. The vets, however, had no trouble getting into combat and killing my Deathrains without losing a single veteran.
    Avenge the Chimera!
    At this point we only had a handful of models left on the board, but we were still winning on VP's. All we had to do was survive till the end of the game and keep scoring points. Those tanks were still giving us a pretty hard beating, so being tabled was still a very real possibility.

    Tau/Necron Turn 4

    Our objective cards at this point were pretty difficult (some were impossible) to achieve. With only a few models, our chances of scoring one were slim. So we focused on killing whatever we could reach.
    The Riptide nova-charged its shield for the 3+ invulnerable and then moved toward the Russes. Since it had jinked and had no good targets, the Night Scythe zoomed off the board. Hopefully when it came back it could help out in the final turns. The Heatwave positioned himself to torch some orks, and the Assassin moved toward the Wyvern.
    My Assassin fired in the psychic phase at the Wyvern's side armour, but did no damage.
    The Heatwave got a decent number of hits, and due to positioning was able to kill a few orks and wound the Painboy (the kustom force field was over 6" away from most of the orks hit). The Doomsday Ark fired at the Leman Russes, but did no damage. The ark's gauss weapons shot at the nearby vets, killing a couple. My assassin ran straight for the Wyvern, hoping to kill it next turn. The Riptide, with some fortunate rolling, exploded the Executioner with its Fusion Blaster. Huzzah!
     My Heatwave jumped back behind a rock. It was a futile gesture, but it was better than sitting there waiting to get killed. The Riptide attempted a charge Pask, but since he'd killed the Executioner he had to roll very well to reach him, and failed.
    Unfortunately, the Executioner wasn't its own squadron, so we scored no VP's this turn.

    AM/Orks Turn 5

    The orks had nothing better to do at this point, so they all moved toward my heatwave. The Wyvern turned to face the incoming assassin, and Pask prepared to shoot the Riptide. The plasmavets moved towards the Doomsday Ark.
    Pask unloaded on the Riptide and managed to wound it twice. Every Ork in range shot at the heatwave, but failed to kill him. The Wyvern targeted the assassin and wounded him once. The plasmavets shot at the Ark, and glanced it once.
    The Orks charged the heatwave, losing the Painboy and another Boy to overwatch flamers. The monat then died in close combat, content with his contribution to the Greater Good. He had done an admirable job torching orks and claiming objectives. 

    Tau/Necron Turn 5

    The Night Scythe flew back onto the board, lining up an attack run on PunisherPask. The assassin continued his advance and the Riptide moved next to Pask for a shot at his side armour.
    The assassin's animus couldn't hurt the AV12 of the Wyvern, so we went straight to shooting.
    The Night Scythe attempted to strip Pask's last hull point but couldn't quite do it. My Riptide stripped the last hull point with his Ion Accelerator and got us Slay the Warlord. The Doomsday Ark fired its Gauss at the vets, killing a couple of the plasmagunners that were out of cover, and shot the main cannon at the mob of Boyz across the field, killing one. 
    My Assassin made his charge, hit the Wyvern 3 times, and rolled 2 sixes for armour penetration. Very lucky rolling, if I do say so myself! The mental image of the assassin ripping the tank to pieces with his bare hands was pretty awesome. It isn't shown in the diagram, but my Riptide hopped into the enemy's vacated aegis line to ensure Linebreaker.
    With the AM army all but gone, and the Orks having a party on the other side of the board, we decided to call the game. We had already been playing for quite a while (those AM shooting phases last Forever!) and were ready to be done. If we'd kept playing, the general consensus was that the remaining plasmavets would be dead soon and the reduced Ork mobs would die as they crossed the board. Assuming they decided to cut their dance party short that is...
    Unts Unts Unts Unts Waaaaagh!

    Results

    Our last few turns were pretty devastating, nearly wiping the AM from the board. There was about half of a veteran squad, with a single plasma gun, hanging around the right side of the board. On the other side there were probably about 2/3 of the Ork mobs left, and only two of their characters had been killed. They were having a Waaaagh! party.

    Tau/Necrons: First Blood, Slay the Warlord, Linebreaker, 9 Maelstrom objectives. 12 VP
    Orks/AM: Slay the Warlord, Linebreaker. 7 Maelstrom objectives. 9 VP

    Tau and Necron Victory!

    Summary

    The game was pretty close the whole time, and it was a blast to play. Our plan had worked out and the Maelstrom objectives had not abandoned us.
    My team-mate learned a lot about his list and wants to make some changes. Our opponents also learned that mobility can be a huge advantage in a Maelstrom game, so they may be changing their lists as well.
    My slippery suits (especially the Monats), bouncing around causing mayhem, were definitely contributors to our victory. First Blood, as always, was a deciding factor, since only one team can score it. Our objectives were tough sometimes, but we stayed focused on the mission and it paid off.
    Let's look at what went right and what did not:

    Good

    • Heatwave Monats. They are dirt cheap and did their job of objective-capping wonderfully. Their cheap, expendable nature made them straightforward to play and ideal for taking up a disproportionate amount of my opponent's resources.
    • Culexus Assassin. An impressive kill record. Though he didn't score any objectives other than Linebreaker, I felt that silencing the Quadgun and the mek guns really helped us out late-game. Unfortunately, the cat is out of the bag, so now everyone knows just how deadly this guy can be.
    • Jetpacks, in general. The high mobility of jetpack units really meshes well with Maelstrom missions. They kept us scoring points and getting us new maelstrom cards (had to hold objectives to get more cards)

    Bad

    • Deathrain-D. I think they were victims of circumstance this game. They drew the short straw when it came to deciding who to sacrifice for the first objective. In hindsight, I probably should have sacrificed my commander first.
    • Anti-horde. A 5+ invulnerable and 5+ FNP on 30 Boyz is pretty insane. Had he put a horde at each flank or deployed second, I think we would have been toast because my units just can't put out enough shooty for that. Flamers didn't kill quite as many as I'd hoped either.
    • Low model count. If I had a few more unlucky rolls, the game could easily have gone way downhill. It can be scary playing with so few models, knowing that so much depends on so few. 
    • Surprises. Some of our success was due to tactical errors on the part of our opponents. Normally, you can't rely on your opponents to make those mistakes. If we had a rematch, things would be much tougher on us.


    Thanks for reading! It was a long one, so I hope you enjoyed it.

    The Culexus Assassin

    $
    0
    0

    The Celexus Assassin

    The rollercoaster that is 6th and 7th edition, has majorly changed 40k. Allies, in particular, have altered how we approach our list-building. Good or bad, this is how it is now. A Dark Eldar raider will fight and die alongside a Tyranid Warrior, an Imperial Inquisitor will actually cooperate with a Chaos Cultist to win a battle, and a Tau Fire Warrior will hang out with an Ork Boy. Fortifications, Superheavies, Flyers, blah blah blah. Things have gotten crazy and now the army combinations are limitless. I still haven't been able to entirely hop on the ally train. The most I've been able to do is ally my Farsight Enclaves with a tiny Tau Empire detachment. But I am coming around. I am going to try including an Assassin detachment in my army. Why?

    Psykers!!!

    Psykers are a big part of 7th edition. They get their own phase and everything! A few factions don't get psykers, due to fluff reasons, but apparently being able to ally with factions that do is supposed to make us poor suckers feel better about it. That's ok, I didn't want them anyways. The problem we face now, is that Everyone has them, or has access to them, and some of those psychic powers are insane. Our markerlight force multipliers are pretty good, but we pay heavy penalties for those multipliers and psykers get to have all these fun abilities basically for free!
    Since I play FSE, the Talisman of Arthas Moloch has been handy. It actually gives me a chance to block some of the nastier psychic attacks that our low leadership Tau struggle against, without resorting to my own psykers. But that is thinking defensively. We need to attack these psykers. but how?

    The Ultimate in Anti-Psyker Warfare

    Everyone is talking about the Culexus Assassin, and I assume that is because it seems like the only answer (outside of joining in on the cheese). Assassins have their own dataslate, so you don't have to bring a full allied detachment to get them, and it is much more affordable to get their rules: $17 from the Black Library. But that model...Gross. I'll make my own, thank you very much. I want it to look like a Tau anyways.
    So, what do we get for 140 points?
    • Impressive statline, from a Tau perspective anyways. 4+ invulnerable, 3 wounds, and very high skills and initiative. He is also a character so he can challenge.
    • Etherium. When you target him, you use WS1 and BS1. So lots of close combat attacks and template/blast weapons will still kill him, but he is tougher to target in the normal way.
    • Animus. Basically a S5 AP1 medium ranged shooting attack made during the psychic phase. It uses nearby psykers and warp charges to function, but Tau don't use their warp charges anyways, so you'll be guaranteed 1-3 shots. If you start getting close to other psykers (as you should be) this weapon can get pretty deadly. The nice thing here is that you can fire it and then run or throw a grenade like normal in the shooting phase, and since it isn't a psychic power it cannot be blocked with Deny the Witch.
    • Psyk-out grenades. Perils are a bit scarier nowadays, so an auto-peril on a psyker, just for hitting its unit sounds like a sweet deal to me. Very useful for hitting those Primaris Psykers buried in infantry blobs (especially if there is a commissar around too). These are his only weapon, so if you aren't within 8" of a psyker's unit, and you aren't planning to assault something, you can just run. 
    • Special Rules. Infiltrate, move through cover, fearless, fear, preferred enemy: psykers, -2 to LOS, no armour saves against cc attacks, and cc wounds cause instant death on a 6. 
    • Anti-Psyker. This is where he gets crazy: 
      • He is completely immune to psychic abilities and he immediately cancels blessings and maledictions within 12". Goodbye Invisibility!
      • Nearby Psykers (12") are -3 to leadership, which can be pretty awesome when combined with Fear and Psyk-Out grenades. They also do not generate warp charges and can only harness warp charges on a 6, effectively removing those psykers from the psychic phase until the Culexus is dead or they move away
      • His close combat attacks cause Instant Death to psykers.
    Pretty decent unit for 140 points. The weaknesses are pretty obvious though:
    • He is only one T4 model and he cannot join other units
    • He is somewhat slow, being regular infantry and lack of Fleet
    • He is a Desperate Ally, and his utility drops if your opponent isn't fielding psykers. 
    • An assassin is its own detachment. In tournaments where detachments are restricted, this can hamper your ability to fill other gaps in your army
    • Very weak against vehicles unless they are psychic pilots. 

    Just Add Psyker

    So why include him in a Tau army? What makes him mesh with our units? 
    • Infiltrators. He can easily get caught out on his own against a defensive opponent, so having some of the best infiltrators in the game (stealth suits and Kroot) to back him up can keep him alive until he kills his target(s)
    • He uses warp charges to shoot, and we aren't using them anyways. You have a 66% chance of getting to shoot his animus 3 times each psychic phase, even when he isn't near a psyker. Not bad when the animus is S5 AP1 and he has BS8.
    • Engaging Psykers head-on. Powerful psykers (the Culexus' target of choice) will often be buried in enemy units. He can attack these psykers directly with his grenades and shut them down with his freakish aura. Tau are usually forced to pulverizing the entire unit before getting a shot at the soft psyker center, and have to deal with the psyker's abilities in the meantime.
    • Monstrous Creatures. Even if your opponent has no psykers, engaging large single models works well for the Culexus, as he will have chances to kill it outright. His attacks can even hurt things he normally would be too weak to wound, thanks to Instant Death. Tau, again, have no way of killing these multi-wound monstrosities outside of mass firepower. Just don't try tangling with CC powerhouses like the Swarmlord or Avatar of Khaine.
    • Anti-Invisibility. Like everyone else, Tau struggle against this power. Markerlights can help, but only so much, and snap shooting at a higher BS still doesn't allow our powerful Ion Blasts. The Culexus can make that power go away just by being nearby. Many players invest a ton of points into getting Invisibility and the Culexus is worth his weight in gold if he can get within 12" of that psyker.
    Tau don't need psykers. They have Ethereals and markerlights and Kingfishers. If we want something, we pay for the equipment instead of casting powers. Allowing our opponents to imitate our awesome force multiplication through witchcraft simply will not do. However, psychic shenanigans, armour, and meat shields keep those psykers safe from harm during our all-powerful shooting phase. The Culexus works like a can opener, stripping away those defensive spells and laying the enemy unit bare for the Tau army to eradicate. Once the unit is weakened by Tau shooting, the Culexus is usually capable at mopping up whatever is left in close combat.

    Like Stealth Suits, the Culexus can be difficult to pin down as a target priority. Even at 140 points, your opponent may be hesitant to commit too many resources to such a small model. BS1 shooting is often dismissed as a waste, and any S8+ blasts will likely be pointed at units of battlesuits instead of your lowly assassin.

    The Culexus plays different from the other assassins, and isn't as straight forward. He often needs a couple turns to kill his targets, so he will need to stay alive longer, and he needs to be close to his prey. If you infiltrate too close without support, he'll be targeted early and die early. If you deploy too far away, you may never catch your quarry, even with the "free" run every turn. Finesse and anticipation of your opponent's moves/deployment are key to the Culexus' success.

    Culexus, Tau Edition

    So, how can we include an assassin without using that crazy GW model? We convert one of course. Shas'la Kais was the first thing that came to mind, due to his history, but it wasn't enough for me. Instead, I opted for assuming some of the Tau race either already contains the Pariah defect, or it is able to replicate the effects through genetic modification. Assuming they were able to recover just a single Culexus Assassin, dead or alive, they would have no trouble recreating most of the equipment in their own way.
    Behold! My Culexus Assassin Counts-As!

    It is a Fire Warrior base, with a modified Rail Rifle from the Pathfinder kit. The augmented muscles and the cloak are green stuff. The cables are paper clips, bent to shape.
    A rail rifle is a S6 AP1 weapon, which is as close as Tau weaponry gets to the Animus, so it was the obvious choice of weapon. I added the under-slung grenade launcher for throwing the Tau imitation of Psyk-out grenades. The cloak hides the stimulant injectors, drug cocktails, and whatever other weird inventions the Fio-techs would use to get a Tau up to this statline. The cloak also doubles as the Etherium.

    Recent Experience

    I have only used him four times so far. The first was a 2000 point doubles game (1000 points each). It was Tau+Necron vs. Astra Militarum/Orks. The only psyker on the board was a Weirdboy, but I stayed away from him because he was buried in a big mob of boyz.
    We managed a victory, despite being pummeled pretty hard early on. My Culexus was definitely the MVP as far as kills went. He killed a squad of Veterans, finished off another squad of Vets, wiped out a unit of 4 mek guns plus Big Mek, and then ripped a Wyvern apart. Mostly with his bare hands too. His success was due to a few factors
    • Opponents had little experience with assassins. They didn't realize how deadly he was until he was in their backfield, especially since they expected him to only be good against Psykers. 
    • Nearby Wraiths. Wraiths have a nasty reputation, so they were targeted first.
    • Engaging targets that were not very good in close combat and that were not Fearless. 
    • Luck, in the case of the Wyvern. I needed 6's to glance it in close combat and I rolled two out of three.
    The last three times were in a doubles tournament with random partners. Unfortunately, my partner was pretty new and we ended up outmatched by some powerful team combinations that got lucky with the draw. We got 7th out of 10. But how did the Culexus do?

    • Game 1: Grey Knights/Imperial Knight plus Eldar. Worked like a charm. The invisible termies came in via Deep Strike, cast invisibility and then my Culexus stripped the blessing away. He killed a few of the termies and opened up the rest of the unit for targeting. Unfortunately, in close combat the Grey Knight player rolled Very well for his invulnerable saves and then rolled really well again for his Daemon hammers so my Assassin died prematurely. I knew in my heart that I shouldn't charge him in, and just keep his psychic phase shut down, but I really wanted to test his limits.
    • Game 2: Astra Militarum plus Necrons. No psykers. Due to my own error I forgot to infiltrate him and so he had to arrive from Outflank and didn't contribute much to the game. By the time he was ripping things to pieces in close combat we were running out of time.
    • Game 3: Orks plus Astra Militarum. No psykers. He blocked the scout move of some Deffkoptas. He ripped a Chimera apart with his bare hands and killed several of the vets inside. However, a very lucky overwatch shot from a meltagun killed him before he could finish wiping the vets from the board.

    I think that this shows that he can be amazing in the right setting, but that a single T4 model is still vulnerable to S8 weapons. I feel he could have been pretty decent in the second game but I simply forgot to Infiltrate him before the first turn started. I clearly need some practice with him, but I think this only shows that his learning curve isn't that bad and the benefits can be absolutely army-breaking.

    Thanks for reading! What do you think about using Assassins alongside a Tau list? Do you prefer the other assassins as Tau allies?

    Tactica: The Sniperside

    $
    0
    0
    This will be a short tactica article, as it focuses on a very specific tactic you can achieve with a Broadside.

    The Sniperside

    The ingredients for a sniperside are quite simple:
    • Broadside Shas'vre with an Advanced Targeting System
    The equipment and members of the Broadside team can vary, but every sniperside has this at its core. Some would say you can have a regular sniperside if you equip a standard Shas'ui with the ATS, but it doesn't give us the same results and lends itself to supporting the actual Sniperside.

    How it Works

    The base cost of a Broadside Shas'vre and ATS is going to be just under 80 points, so what are you getting for your investment? Let me show you.
    The ATS grants the user Precision Shots (on to-hit roll of 6, you get to nominate the target model). If the user is a character this bonus is extended to to-hit rolls of 5 as well. This is a bit of a loophole leftover from 6th edition when characters already had Precision Shots. Since all Broadside weapons are twin-linked, and they only hit on 4's anyways the odds of getting a precision shot with the Sniperside are actually quite high:
    • 33% chance for first roll
    • 33% of 50% for a second roll
    • Total = 50% chance of a precision shot, 25% chance of a regular hit, and 25% chance of missing altogether
    • These odds go for the all weapons, since every weapon carried by a Broadside are twin-linked
    That isn't as good as some of those sniper characters out there, but it's not bad at all. And our Broadside carries heavier artillery than most of those sniper characters anyways. So, how can we apply this to get the most of our Sniperside?

    Loadouts

    Obviously, the first thing that comes to mind is the Heavy Rail Rifle. It's huge and sniper-y and kills just about everything. But, oh how far the railside has fallen! They ruled the tables in 5th edition, and now they are lucky if they see the table at all! Fear not, the HRR is perfect for our Sniperside. It will insta-kill most infantry, ignores armour saves, and can hit anywhere on the table that it has line of sight to. The weapon is also capable of penetrating AV13, which is sometimes exactly what you need. 

    The High Yield Missile Pod is the weapon of choice for most broadsides, and it can be useful here. With 4 shots, you should land 2 precision shots a turn. Admittedly, this will be most useful against light infantry targets (such as an Astra Militarum heavy weapons team) or vehicle squadrons. It is more useful against squad leaders since it can force more Look Out Sir rolls, provided the squad leader does not have 3+ armour or better. The range is a bit of a limiting factor, so they are forced to be a bit closer to the danger. While the HYMP has its applications on a Sniperside, there aren't that many the HRR can't accomplish as well. The HYMP brings you the advantage of being a superior weapon outside of the sniper role.

    Plasma Rifles. These cost points to upgrade, and surprisingly don't bring you much. They are better used on an Early Warning Override broadside to mow down marines arriving via drop pod.

    Smart Missile System. This is an excellent backup weapon for the sniperside. It can get you a few extra precision hits to force armour saves on your intended target. It has the super awesome Ignores Cover and Homing abilities and is much better for Overwatch defense.  

    Example Targets

    • Raven suit in a Farsight Bomb. The loophole in the Farsight bomb allows an FSE army to have bodyguards carry the special equipment from the Tau codex. The PEN, CCN, and M3S are usually all crammed onto this one model and killing it will massively reduce the bomb's damage output.
    • Banners. Almost never on characters, but always a good target. Kill this and you'll usually remove some sort of aura or benefit to your opponent.
    • Special/Heavy Weapons. Usually not carried by characters, meaning they have no defense against your precision shooting! The HRR works better against anything with 3+ armour or better, but the HYMP can possibly pick out more models if the targets have 4+ armour (vets in carapace armour, artillery crewmen, Scouts with missile launchers, etc.)
    • Characters. Regular characters are an option, since 4+ Look Out Sir is not something to be relied upon for defense. Independent Characters should be avoided, since a 2+ LOS shouldn't ever go your way. If there aren't better targets, then you might as well shoot the IC
    • Necron Command Barge: a precision shot can be allocated to the chariot, which is the weaker half of this model. The HRR might penetrate, which would kill the quantum shielding, making the entire model vulnerable to our massed S5 shooting. The HYMP can land more hits, but the HRR is probably the better pick here, since a regular shot with the HRR can put some hurt on the Overlord as well.
    • Specifically Positioned Models. This one is more situational, and will not happen often, but can change the game if you keep an eye out for it. Maybe that one model is the only model within 3" of an objective and killing it will allow you to score it. Maybe one model has its toe in your deployment zone in the final turn of the game. Positioning can be a big deal, and sometimes it comes down to a single grunt, and those are the perfect target for the sniperside.

    Conclusion

    Granted, I have not had any experience with this specific loadout. It is something I've looked into, and I've deployed it, to a degree, in Kill Team (the ATS isn't needed in KT). It isn't a tournament winning surprise unit, but it can be a fun way to change up your Broadside units. Throw this guy in with two Missilesides carrying Target Locks and you have a multi-purpose unit that does what you already wanted it to do plus the occasional insta-killing sniper shot.


    Fighting 7th Edition Eldar with 6th Edition Tau

    $
    0
    0
    The title says it all. This post is some of my musings on dealing with the newest codex arrival: Eldar. I was going to post on how to deal with Necrons a month or so ago, but the answer for them is the same as always, so I refrained. (In case you were wondering, it is volume of fire and mobility)

    What's New Eldar?

    Eldar are the next step in GW's scheme to turn regular 40k into Apocalypse 40k. If you haven't heard, they are quite good. Their strength is not necessarily in unfair rules, but in their cost. Powerful models are cheap and you can take tons of them. In fact, just about everything in the book got a boost, except for the wave serpent, which had its serpent shield dialed back a bit. It's still a very cheap transport for what it brings, but it isn't going to rule the tables like it has for the past 2 years. So here are a few of the units that jump out as powerful:
    • Wraithknight. It's tougher and carries two D guns. Oh yeah, and it's Gargantuan. It's under 300 points too
    • Jetbikes. Same price but can put a Scatter Laser on every bike for 10 points. 
    • Wraithguard. D strength weapons with no cost increase
    • Warp Spiders. Jetpacks that can now jump them away during YOUR shooting phase, and you don't get to pick a new target if they end up out of range. Their guns also wound against Initiative, so just about our entire codex is wounded on 2's
    • Swooping Hawks. Can move faster, and when they move over a flyer's base they hit it with a bunch of haywire attacks. 
    • Tanks. All three of the battle tanks can be taken in squads, allowing an Eldar player to field way more in a single detachment. They get shooting bonuses when taken together as well. 
    • Farseers. They were always top dog in the Psychic department, but now they can re-roll psychic dice at will. That means they will almost never fail, almost never Peril, and will Deny the Witch more often.
    • Wraithfighter. It's template weapons are now D strength, it can be a level 2 psycher, and has access to regular powers instead of just one.
    • Dark Reapers. Get lots of shooting bonuses against flying things, and their guns still work good on all other targets too. 
    The first thing you expect is a wraithknight or three. Unlike everything else in the game, Eldar can take basically as many Lord of War as they want if they fulfill the core requirement, which is a bunch of Jetbikes. Not really a tax since Jetbikes are now disgusting. Expect to see as many Jetbikes as your local Eldar player can afford to field. 


    What Can Tau do against such reckless distribution of D weapons?

    It really isn't that bad. All of the D template weapons (D-Scythes) are at a -1 on the D chart. So they can never roll a 6, and they will only wound 2/3 of the time. Better rethink trying to tie up Wraithguard in close combat though. Wraithguard still require a delivery system (wave serpent, webway portal, Dark Eldar raider) or they'll get shot to bits. The Wraithknight is not all that different to Tau shooting either. Our biggest problems are how to survive D weapons long enough to apply our own firepower to the not-all-that-squishy-but still-squishier-than-some Eldar.
    We are presented with this dilemma: 
    1. D weapons can bypass invulnerable saves. Cover saves are the best defense.
    2. D-Scythes ignore cover. Invulnerable saves are the best defense.
    We can't get access to Invisibility, which is what most codices are falling back on. We can't spam hordes to overwhelm the D weapons with bodies. And if these D weapons get the first shot, they will kill what they shoot at. So what do we do? Tau have been at a disadvantage for some time now, so we do what we always have to do to win: we outplay them. 

    With Power comes Predictability

    You know exactly what he is going to do with those D weapons. Eldar weapons are polarized enough that you'll know what he is going to shoot when you present him with a certain set of options. This gives you a chance to force him into tough decisions, and maybe make the wrong one. 
    • D-Weapons: Riptides, Broadsides, O'mortal, 
    • D-Scythes: Vehicles, Stealth Suits, 
    • Scatter Lasers: crisis suits, light vehicles
    • Striking Scorptions: will move to attack infantry early
    • Swooping Hawks: will deep strike or move for Firewarriors in cover
    We all know how much Eldar players like their cheese...
    We can kill the D-weapon carriers with anything in our codex. It is the Jetbikes that are a problem with their 3+ armour, cover save shenanigans, and extreme mobility. Scatter lasers are one of the few multi-purpose weapons the Eldar carry, and Jetbikes are where you'll see a LOT of them. Jetbikes will also be the primary scoring units. To kill them we need to strip their cover saves away and punch them out of the sky. Thankfully, Tau have multiple ways of stripping cover.

    Bait and Switch

    You know what the Eldar wants, so pretend like you are giving it to him. He wants you to stay put with expensive units and allow him to come to you on his terms. Make a show of castling up with a unit of Broadsides, some Firewarriors, a Cadre Fireblade, and maybe a Riptide. You'll need cover against the first volleys of D weapons from the Wraithknights and Wrath batteries. However, after that first turn or two, cover won't do you any good, so it is best to stay mobile and keep your opponent guessing. When he storms your position, all he should get out of it are the Broadsides, the Comms Relay, and maybe the Firewarriors.
    Deep Striking battlesuits are perfect for your counterattack. The Eldar has to commit his Wraithguard/Striking Scorpions/Swooping Hawks in the first turns which allows you to counter-attack where these units aren't and take out the mobile Scat Attack Bikes. Once the heavy hitters are committed, it takes at least a couple turns for them to redeploy elsewhere, and the game could be over by the time they react. If you are running Farsight Enclaves, you can drop tons of battlesuits everywhere, and they are all Obsec (unlike the Eldar units).
    Other good counterattack units are Piranhas and Kroot, since they have ways of covering ground quickly and avoiding death at range. They can arrive from Reserve (which seems to be the only safe place in the game now) and still get their respective jobs done. Just watch out for those cover-ignoring Serpent Shields, which will shred Piranhas.

    Obsec

    We have access to good Obsec units, but Eldar don't get any if they use their Warhost detachment. Jetbikes can be Obsec in a regular detachment, which only adds to the emphasis that you need to kill them to win. Winning comes down to who gets the objectives. If you end the game with one Fire Warrior standing on an objective, didn't kill a single Eldar, but scored 4 objective points to his 3, you win. He may be able to say "I killed all your units and didn't lose any!" but he cannot say "I beat you. I won. You lost." at least not in this universe.
    Drop Farsight troop crisis suits everywhere and nab objectives throughout the game. Take cheap Kroot units and outflank them onto objectives. Clog the board with Devilfishes or Piranhas. If you can take enough steam out of the Eldar player's attacks, he won't be able to kill all of your Obsec units and that might just be his downfall.

    Rethink Riptides

    3 Riptides probably isn't the best option against Eldar. Riptides are made to soak up fire, not to dish it out. The D-weapon basically takes away a Riptide's ability to tank wounds, making it an expensive liability. One or even two seem useful, since they will draw attention, and that is valuable, but you better be relying on something else to put the hurt on your opponent. Eldar are now the Elite killers, and any army that doesn't bolster their power units with decent run-of-the-mill units is in trouble.
    This may be something players have begun doing already, since there are now multiple combinations out there that can easily kill a Riptide per turn.

    Efficiency

    Eldar have a big cost advantage right now. Their units are dirt cheap for what they are capable of accomplishing. Streamline your own army to reduce waste. Things like solo Hammerheads, Longstrike, superbuff Riptides with shield drones, shas'ui/shas'vre upgrades, extra equipment, In short, anything that can't perform multiple tasks could be dead weight. So what units are points efficient?
    • Piranhas. Super cheap when you consider they carry 2 drones
    • Firewarriors. The most points efficient method of getting S5 AP5 shots on the table
    • Crisis Suits. Mobile, tough, good armour, and good weapon options. Obsec in a FSE list
    • Broadsides. Cheapest way to get accurate, massed missile pods onto the table. The SMS is choice for engaging Eldar as well
    • Devilfish. Obsec if taken for Firewarriors. Can jink around with 3+ cover saves with decent armour against non D-weapons. You need to keep it away from Wraithguard carrying D-Scythes though.

    That's all for now.

    Comment below if you have some thoughts on what Tau can do to keep an edge over those pointy-eared pansies.
    I have not had the pleasure of facing the new Eldar yet, but I am excited for the challenge. I will point out that someone compiled the results from 18 games after the new codex him.The New Eldar won 15 times. Tau was one of three armies to beat them (Grey Knights and Necrons were the other two). They are strong, but Tau have what it takes to win!


    Converting the XV109 Y'vahra

    $
    0
    0
    When the Riptide came out, I swore I'd never buy one. It went against the fluff and I thought it was ugly too. Then the R'varna came out and I said, "Well this one looks better, I can get behind that" and then the Y'vahra was released. Oh my. This is how the Riptide should have looked all along.
    From Forgeworld's website

    The XV109 Y'vahra battlesuit

    I did a post earlier on the Y'vahra when it was first released HERE. I picked on of these bad boys up because I felt it was too awesome to pass up. Rules-wise, it has all the right elements that the XV-9 should have had. It is risky but can be devastating if used correctly. Sounds perfect to me! I already run a high-mobility, battlesuit-heavy army and I am hoping that this guy will give me what my list lacks: instantaneous response.
    The 24" thrust move (which currently can be used every turn until it is FAQ'd) is insane and allows you to threaten stuff your opponent normally would think safe, and on turn 1.

    Imagine your opponent is using an invisible, gating Centurionstar (boo!). You get first turn. You pop your Nova and try to get the 3+ invulnerable in close combat. You thrust your Y'vahra right up to the star, hit it with two full templates of S6 AP2 ignores cover. If the psykers are the closest model, the S8 ion weapon could be insta-gibbing if they get unlucky with their LOS. You are probably going to kill some stuff.
    Then, when your opponent thinks it's over, you charge the Y'vahra right into combat. He is essentially helpless this turn against you, because he hasn't had a chance to cast Force on his psyker weapons. You do some damage and get stuck in with your 2+/3++ or 2+/4++ if you failed the Nova roll.
    His super deathstar is now hurt and tied up in combat for his first turn. He can't shoot your Y'vahra and will have to hope he can get an instant-death force attack through your invulnerable shield. Either that or commit a close combat unit to help kill it and waste precious movement time. Bwahahahah! If the Y'vahra dies, you've bought yourself time and probably caused a fair bit of damage to the star before it goes invisible and starts gating. If it doesn't die, you can try to Nova jump out of combat to come back later. You aren't really hurting your chances of shooting the Centurionstar in the second turn, because it would have been invisible by now anyways.

    Now, let's say you are more conservative and you worry you'll end up going 2nd. You can put it in reserves and use it as a quick response model. When it arrives from reserves it can move on 24" and roast stuff before your opponent can respond, still granting you first strike with your potent model, even if you won't be able to roast that Centurionstar.

    My name is Skyler and I am a conversion addict

    I can't leave models alone. I have to cut them up, magnetize them, customize them, improve on them. You'd think an expensive model like the Y'vahra would dissuade me from risking total loss of resin gold, but no. Like the R'varna, I wanted this to be usable as a regular Riptide so I had to scratchbuilt arms and magnets. It also required a sufficiently awesome base.
    Base WIP
    Starting with the base, I wanted this to convey a sense of  blowing past entrenched positions to get at the real hard targets. A scorched Astra Militarum position was just the ticket. Poor burned guardsmen, all they ever did was stand between the Y'vahra and the Leman Russes...
    GS flames added, and the R'varna stepping over the defensive line.
    I swapped the head with the targeting piece from the Aegis Quadgun. I felt it scaled better with the model, and fits perfectly with Tau aesthetic.  
    This Jetpack is 90% of why I bought this model. So awesome!
     So, I now needed some arms to hang weapons from. I scratch-built the forearms/hands and added some bits, bobs and paneling to make it look more Tau.

    Notice that I preserved the elbow portion of the weapons. I cut this piece away from both weapons before converting the weapons to be under-slung versions.
    I also magnetized the little wings to futher distinguish between XV104 and XV109
    I built the arms in such a way that they could hold either of the regular Riptide main weapons.
    So now I needed the weapons. I had already cut away the elbow portion, but they needed a bit more work before I could add the large magnets.
    I replaced the shafts on the Ion weapon with wire. Straighter and less bulky.
    The Riptide shoulder pauldron on the right forearm covers where the Riptide Shield Generator will go

    What's Next?

    The conversion is not complete, and I have yet to paint it (only basecoated so far). Currently I am in painting mode to get my army ready for an upcoming tournament, in which my Y'vahra will make its first appearance. After that I can focus on completing the Riptide crossover portion of the this model.

    Since I already had the weapons prepared from the R'varna all I have left to make is the Riptide Shield Generator. I will make it a bit fancier since it can double as the Ravelin Shield Generator (Y'vahra only) if I make it to work alongside the Y'vahra weapons, which shouldn't be a problem.

    The Y'vahra's guns could use some refining as well to make them look a bit more integral, but that will be low on the priority list.

    I'll post pictures of the finished model after it's painted. Let me know what you think so far!


    Deep Striking: Tau do it best

    $
    0
    0
    I play against opponents who hate Deep Strike. They hate reserves. They hate anything that might possibly roll badly for them. Nothing against those players, that is a valid tactic, especially when you are playing Astra Militarum and can't afford bad reserve rolls. But I believe Tau are among the top races when it comes to deploying from Reserve, and here is why I believe that.
    Drop pods are the best. Why haven't Tau duplicated this?


    The Risks

    Whenever you deploy units from Reserves, there are risks involved. Some factions handle these risks better than others, and some players aren't willing to accept them.
    1. Delayed Arrival. We can't all be GW's poster boys, immediately arriving on turn 1, impervious to mishaps. Our reserves arrive as early as turn 2 and there is a very real possibility they will arrive as late as turn 4.
      I think Tau definitely need Drop Pods...
    2. Can't Assault. That is a whole phase of damage inflicting potential that you are missing out on. Not a huge deal for Tau, but our suits and Kroot really aren't that bad in cc.
    3. Exposed to return fire (Deep Strike). Usually you'll try to drop in a safe place, close enough to either charge next turn or rapid-fire this turn. That means you are standing in the furnace and if you don't make this shot count, you'll be dead next turn.
    4. Intercepted. Tau are exceptional controllers of reserves, even your opponent's. But some factions can Intercept your units as they arrive, and that can be a danger if you are using fragile attack platforms
    5. Loss of Firepower. Anything you put in reserves can't help you on turn 1 (excepting aforementioned auto-awesome-cuz-I-spess-mahreen's). Games can be won and lost in the first turns of the game, and giving up firepower on the front end can put you on your back foot, playing catchup.
    6. Mishaps. The biggest danger, as there is a 66% chance your unit will either be dead or hopelessly mispositioned. The other 33% chance is that your unit goes back into reserves and that is another turn lost.

    The Benefits

    Those are some pretty big risks, so what is the good news?
    1. Cannot be targeted. With the advent of ranged D weapons, Centurionstars, mega-alpha-strike armies, and other super killiness silliness, we have reached a point where placing a model on the table will spell certain death if you end  up going second. This benefit wasn't such a biggy before, but now it is a very real advantage that your units cannot be targeted in reserves (yet...I hear space marines still need a 7th edition codex).
    2. Hit First. You get to shoot first, barring any Intercept shenanigans. Even if you lose the roll for first turn, or intentionally go second, you can deploy your models to get at least one maximum firepower shooting phase. You have to weigh this benefit against not shooting at all until they arrive, but for close-range weapons this is a clear winner.
    3. Reaction time decrease. You get to see the beginnings of your opponent's plan in the first turns. You can bring your models in exactly where they need to in order to undermine ore counteract your opponent's strategy.
    4. Equivalent of extreme mobility. Regardless of how you are arriving, you have a big area you can arrive in, and you get to pick where (for the most part). Not only do you get to react to your opponent's moves, you don't have to worry as much about these units being drastically out of position and unable to get where you want them. 
      Can't Catch Me!

    Why Tau?

    Tau are unique in that they don't suffer from some of the risks, and mitigate others. In 5th edition we had excellent reserve manipulation equipment, but not so much in 6th and 7th. We do, however, still have the necessary tools to pull off a Ninja-Tau attack. 
    1. Thrust moves. We can use these after a Deep Strike to re-position our battlesuits. This is huge, since counter assault and blast templates are a very real possibility and this helps with that.
    2. Multi-Wound Deep Strikers. We can deep strike into forests and on top of buildings, and we don't have to worry about losing any of our firepower once we arrive! Sure, losing a wound sucks, but even if every suit fails the dangerous terrain and armour tests, you still get to shoot at full capacity! The exception here is Stealth Suits, which should probably be deploying via Infiltrate or Outflank anyways. Vespid also have only one wound, but they auto-pass dangerous terrain tests.
    3. Powerful Shooting. Our Deep Strikers pack a punch. ALL of them. No wasted bodies on bolters so that you can take meltaguns because EVERY battlesuit carries 1-2 of the weapon of your choice. 
    4. Spammable. We can bring in a LOT of reserves, and you don't even have to spam specific units. Crisis suits, Stealth Suits, Kroot, Darkstrider+Firewarriors, Piranhas, Flyers, Vespid are all good reserves options.
      Crisis suits dropping Everywhere!!!

    What to use

    As I mentioned before, our codex is chalk full of special deployers. The most useful are those that can also be Objective Secured (Obsec) in a Combined Arms Detachment (CAD).
    1. Kroot: Infiltrate and (subsequently) Outflank. You even get to put them in Outflank after you've seen both armies deployed. When carrying snipers they can hurt most things and they are difficult to root out of a forest. They also move quickly to cover ground and grab objectives.
    2. Crisis Suits: the tip of the spear. Perfect for Deep Striking and not too pricey for the damage potential they have when supported by markerlights. Especially useful when running a Farsight Enclaves detachment, as you can take way more of them and they become Obsec. A single Crisis suit with two flamers is a measly 32 points. He's no Scat Attack Bike, but he gets the job done and will surprise you with how resilient he is.
    3. Stealth Suits: Deep Strike AND Infiltrate/Outflank. Don't Deep Strike them. Outflank or Infiltrate will get them where they need to go safer. Outflanking them is fantastic since they are massively hard to kill in the later turns of the game, especially if they come on where you want them to.
    4. Flyers. Naturally, these have to arrive via Reserves. I don't use them myself, but they can be instrumental in countering enemy aircraft and dropping Ion blasts on enemy infantry. 
    5. Fire Warriors. Arriving from regular reserves will keep them alive until you need them. Best used for grabbing backfield objectives and denying your opponent first blood off of our relatively squishy infantry. If you take Darkstrider and a Devilfish, you have a decently mobile Outflanking Obsec force that will wound just about anything that isn't a vehicle. Perfect for storming your opponent's backfield objectives.
    6. Farsight Bomb. Of course this must be mentioned. The Farsight Bomb is the Tau's most powerful unit combination, it puts out the maximum amount of firepower with maximum flexibility against all types of targets. It arrives via Deep Strike and does not scatter. If you build it right it also ignores dangerous terrain, can almost never be caught in combat, and is incredibly hard to kill at range. This unit is less for disrupting your opponent's advance and more for breaking in his teeth and killing everything within 18", hopefully winning you the game.
    7. Comms Relay. This is a must for any Ninja-Tau commander. It is all we have left for manipulating reserves and is relatively cheap (70 points with an Aegis defense line). You can use this to try and delay some of your forces as well, to give your opponent time to spread himself out and open up firing lanes. 
    Naturally, these aren't the only options, but they are the most common and the most useful tools for a Ninja-Tau commander. Special recognition goes to reserve manipulating warlord traits. Farsight Enclaves has a trait that grants +1 to Crisis Suit reserve rolls, Tau Empire has the no-scatter-Deep Strike trait, and a Strategic trait acts like a built-in Comms Relay (+1 to Steal the Initiative too!).

    Conclusion

    Tau are falling further and further behind in the arms race (ironic) and it's starting to show. When deploying regularly spells certain death, it's time to re-think how you get your models where they need to go. 
    Thankfully, Tau have a multitude of special deployment methods to help pace the battle as we want. Quit trying to out-castle Astra Militarum; quit trying to out-shoot Eldar; quit trying to out-Alpha Strike Marines. That time has passed and now it is time to start fighting dirty.


    1850 Tournament List - Farsight Enclaves

    $
    0
    0
    I know. This is just another list on the internet. Who cares? In this day and age of weekly changing tournament standards, this post might be obsolete in a manner of months, but I'll post it anyways so I can reference it later. I intend to write-up my experiences with this list in our upcoming tournament. Read on if you are curious.

    1850 Tournament List

    This list is my sad attempt at a competitive Tau list in a time when our codex is well behind on the power curve. I am not a total WAAC player, so I still sprinkle in some flavor and character to my lists, but this really is pretty close to the best I can do. Tau are pretty much required, these days, to self-ally in order to get the most of every piece of equipment available to them.
    Since I am the TO for our 40k tournaments, I submitted my list to one of the other players before anyone else submitted to me. This is to show I wasn't tailoring my list. We are using the NOVA Open's format, with a few small tweaks to suit our area and open up restrictions a little bit.

    Primary Detachment: Farsight Enclaves (Combined Arms Detachment)

    Commander: Fusion Blades, Talisman of Arthos Moloch, Drone Controller, VRT, 2 Marker Drones
    Riptide: Ion Accel, TL Fusion Blaster, Earth Caste Pilot Array, EWO
    1x3 Crisis Team:Deathrain-D
    1x2 Crisis Team:Cloudburst-D w/ CDS. 4 Gun Drones
    2x1 Crisis Team:Sunforge-D
    2x1 Crisis Team: Heatwave-D
    Drone Squadron: 4 marker drones

    Secondary Detachment: Tau Empire (Combined Arms Detachment)

    Commander: KingfisherIridium Armour, Stims, Shield Gen, VRT, PEN, NSJ, Onager Gauntlet
    2x1 Crisis Suit: Sunforge-D
    1x10 Kroot: sniper rounds
    1x6 Fire Warriors: carbines, EMP grenades
    XV109 Y'vahra: Stims, EWO
    1x2 Remora Drones

    The Formula

    The Kingfisher joins the Deathrain-D team to operate as my primary damage dealer in the early turns. They double as the bait, drawing the enemy in and hopefully tying them up for a couple turns with the O'mortal's outstanding staying power. The marker drones and Fusion Blade Commander (FBC) will provide marker support and counter-assault. The drones are also there to detach and act as an assault/movement screen when necessary.
    The Riptide and Y'vahra will look big and attract attention, as well as provide a bit of Interceptor cover against Drop Pod armies. Once the enemy is in my lines they can get the heck out of dodge and make for late game objective holding.
    The Kroot infiltrate to limit enemy scout moves, or Outflank if there are no enemy scouters/infiltrators. The Fire Warriors stay in reserve to walk on when it is a bit safer. They are packing EMP grenades so they can clear out any lingering drop pods/transports securing my objectives.
    Remoras provide some air support, and drop down into skimmer mode when they need to hold objectives. I have no problem Jinking them to keep them alive, as they are almost entirely for late-game support and objective capping.
    Crisis Teams all Deep Strike (except maybe the Cloudburst-D). They land all over, grabbing objectives and trying to roast some vehicles in the enemy's backfield. In the past, they have proven instrumental in confusing Ork advances, so I hope they'll do just as well here.
    Note: I've taken the forgeworld units in the TE detachment because I am still fairly certain that RAW disallows FSE from taking anything from Forgeworld. The only downside is that my Y'vahra won't get preferred enemy: Orks in close combat.

    The Field

    I've received a few of the lists from other players, and things are shaping up to be quite the throw down. We have Space Wolves, Grey Knights, Dark Eldar, Astra Militarum, Orks, Space Marines, with only one or two Imperial Knights. No Eldar. There will be superheavies, centurionstar, Drop Pod assault, biker rush, Dark Lance spam, crazy Ork formations, Forge World, etc.
    The lists are nasty and I'll be hard pressed to do well at this tourney with my dated army, but I feel my list has what it takes to win if I play the scenarios right. My lack of air support is a little bit disconcerting, but I'm interested to see how the Remoras do in that area. The Y'vahra needs to make a good showing as well.
    Our area, like many areas, is actually pretty light on true Line of Sight Blocking terrain pieces. We have lots of GW terrain, but it never seems big enough to hid any of my battlesuits. This is why I rely on O'mortals and Deep Striking to keep my suits alive against enemy shooting. Hopefully this doesn't put me at too great a disadvantage when I end up going 2nd.

    Bonus Tactic

    I hope to take advantage of the Y'vahra's extreme threat range at some point in this tourney.
    On the first turn, the Y'vahra can novacharge its shield to a 3++ in close combat, move 24", flechette its target or a nearby soft target, fire at its target, and then (when your opponent thinks it's finally over) charge. If you get first turn, your opponent's psykers will not have a chance to cast Force on their weapons, making them pretty lame against a 2+/3++ monstrous creature with FNP.
    A turn 1 assault would be perfect for putting my opponents on the backfoot, and might even forestall a Centurionstar before it has a chance to get rolling. Depending on what survives, it might even be worth trying to Hit and Run right out of combat. We shall see...

    Another side note: the Y'vahra can use its 24" special movement every turn due to how it is worded and how the rulebook defines a "turn." I haven't yet decided if I am going to abuse this loophole or not. I think I shall. Should I warn my opponents beforehand?


    Thanks for reading! Comment if you feel the need. My list is submitted already so I can't change anything now but I'm always open to hear what people think.


    Tournament Results: Round 1 vs. Necrons

    $
    0
    0
    ---Shas'El Bork'an J'Shas'ka watched the approaching icons on his cartographic display. At their current speed the machines would be here in only a few Rai'kor and the Fio hadn't finished their work. His escort cadre would need to stall their advance if the data was going to be safely extracted. He turned his battlesuit and addressed the stocky figure working at the data array, "Fio'ui, continue your work, no matter how close they get. The data's transmission is paramount." The Fio nodded and went back to work calibrating the equipment with his data slate.

    The first silver figures emerged from the mist on the far side of the ruined imperial outpost, walking slowly but with the lazy confidence that they could not die. El'J'Shas'ka ignited his Fusion Blade and began indicating targets for his marker drones to begin tracking for the rest of the cadre.
    He leapt from the bunker's parapet, thrusting his battle suit straight toward the enemy. He would engage them as far away from the Fio as possible. Time was against him, but the Greater Good would prevail.---


    As promised, here is the battle report for Round 1 of our local tournament: "The Quickening." My first match was against Necrons.


    The Armies

    Necron Decurion Detachment

    • Royal Court
      •  Imhotek, Lord, Cryptek
    • Reclamation Legion
      • Overlord
        15 Warriors in a Night Scythe
      • 10 Warriors in a Ghost Ark
      • 5 Immortals
      • 5 Tomb Blades 
      • 10 Lychguard
    • Canoptek Harvest
      • spyder, 5 scarabs, 6 wraiths
    He is relatively new to the game, so he was still finding out what units he liked and what units were good. His inexperience showed through a couple times when he targeted units that were not actually contributing to my victory at all.

    Tau (Farsight Enclaves+Tau Empire)

    I've outlined my army's composition HERE. It is reminiscent of my usual list, but since Forgeworld was allowed I took advantage and fielded some of my seldom-used toys.

    The Scenario

    Mission: modified NOVA mission. 4 objectives, one in each table quarter. We both chose the "score as you go" option. You score at the beginning of the turn: +1 point for holding two points, +1 for having more than your opponent, +2 for having 2 more than your opponent. Scoring started turn 2.
    We also secretly selected our secondary objectives. I chose 1st Blood, Linebreaker, and marked his Ghost Ark for death. He chose Linebreaker, marked my Kroot for death, and an objective that required him to kill all my Troop choices. Each secondary was worth 2 points.
    Deployment: Dawn of War
    Night Fight: No
    First Turn: Necrons
    Warlord Traits: My warlord was WS5 from the FSE traits, and Imhotek got to choose his each turn.

    Disclaimer: The diagrams may not always match up exactly with the pictures. Things get forgotten or moved around in the mind. Just take it in stride and keep reading. It is also difficult to show both the regular movement and the "thrust" movement for jetpacks and jetbikes. That is why you will sometimes see units moving out of turn.

    Deployment

    He spread out with his harvest, immortals, ghost ark on the left and his "deathstar" near the center and the tomb blades on the right.
    I countered by putting my Kroot and some Heatwaves on one objective to slow down his wraiths and scarabs. I put the Y'vahra opposite the only vehicle on the board. My Deathrains+Kingfisher, Riptide, and Fusion Blades Commander (FBC)+Drones all deployed on the right. 

    Necron Turn 1

    The Necrons advanced as quickly as possible. The Spyder hung back a bit, keeping out of sight and the Immortals stayed on their home objective.
    The tomb blades didn't kill anything this turn. The Ghost ark and the warriors inside targeted my Kroot. My Kroot went to ground and suffered no casualties. 

    Tau Turn 1

    The wraiths would be hitting me next turn but I didn't have anywhere near enough firepower to bring them down, so my best bet would be to try and hold them up as long as possible. I kept my Kroot in the defense line on the objective with the two Heatwaves nearby to control the objective and act as the second line of defense.
    My Y'vahra immediately jetted up behind the Ghost Ark, poised to tear it a new one. My other units shuffled around to make sure they had line of sight to the Tomb Blades.
    The Y'vahra torched the Ghost Ark but unfortunately failed to kill any of the warriors inside. The Ion weapon stripped two hull points but failed to kill the vehicle! Thankfully, I did land a Penetrating hit so it was AV11 for the rest of the game. My Deathrains killed two of the Tomb Blades and my Kroot got a lucky wound on one of the Wraiths. The Riptide failed to destroy the Ghost Ark due to Jink as well.
    I jumped my units back a bit and jumped my Y'vahra deeper into enemy territory. (see next diagram)

    Necrons Turn 2

    He scored a point for holding his two home objectives. His Spyder failed to spawn any scarabs, but did not suffer a wound either. His Night Scythe arrived so he flew it 36" over to my objective and unloaded all the warriors right in front of my Deathrains. The Wraiths moved up for their charge, the scarabs moved up to engage my Y'vahra. The Ghost Ark, cruised right up to my defense line. He was going to disembark but was unaware that you can't move more than 6" if you are going to disembark, so he kept his warriors inside. The lychstar and tomb blades moved forward, abandoning their objective to go for the kill. The Spyder also started moving up alongside the building, still hugging cover.
    The Ghost Ark and passengers shot at the Kroot and I failed 3 of my 3+ saves. The Kroot did not flee though. The Tomb blades fired at the marker drones+FBC and killed all but one drone and the FBC (who was now down to two wounds). The newly arrived warriors unloaded buckets of Gauss dice into my Deathrains but my Kingfisher took it all and only lost one wound (ha!). This would have been a great time to use the Neuroweb System Jammer, but I forgot (as always) that I even had it.
    The scarabs charged my Y'vahra, losing one base to Overwatch, and tying me up in combat. The Wraiths charged in and killed everything in range, leaving only 2 Kroot way out of position. We got so caught up trying to figure out if we were still locked in combat that I forgot to test leadership (which I definitely would have failed). If the Kroot failed their morale check (needed a 3) and got swept (Initiative 5 vs. Initiative 3) he would have denied me 1st blood by wiping out my Kroot early (he hadn't chosen that option as a secondary objective).

    Tau Turn 2

    I had been stupid and moved my Heatwaves away from my home objective, hoping to avoid a multi-charge and counter the approaching warriors. If I'd left it alone I would have got a VP this turn. All of my reserves arrived, except for the Cloudbursts. I dropped one Sunforge on the objective he'd just vacated and dropped the other three around his Immortals. I Nova charged my Riptide's secondary weapon and used the Y'vahra's nova ability to jump clean out of combat with the scarabs. I granted my Deathrains Furious Charge with the PEN.
    I moved my Heatwaves up to get range on the Ghost Ark, moved the Riptide within 18" of the ark, and my FBC moved straight for the Tomb Blades. My Firewarriors moved and ran straight up the field, making for the objective swarming with Wraiths.
    The Heatwaves cooked two of the Necron warriors alive in their transport (So glad I finally got to use No Escape) then my Riptide and a Sunforge that was in range finally managed to blow up the Ghost Ark. My Deathrains shot up the warriors, killing some but I don't remember how many. My Remoras forced the Night Scythe to jink but only stripped one hull point from it. One Sunforge missed the immortals, but his friend killed two. The immortals failed their leadership and fled a little bit. The third Sunforge targeted the scarabs and killed one base.
    My FBC and Drone charged his Tomb blades, losing the last Drone to overwatch. My Deathrains charged the Warriors. The FBC killed one Tomb Blade and suffered no wounds, then the Tomb Blades failed their morale check and my FBC ran them down. The Deathrains killed some more warriors but they passed their morale check with flying colors. The Wraiths finished off my poor Kroot.
    I managed to jump one of my Sunforges within contest range of the objective held by the immortals, but unfortunately this was one of my Tau Empire suits so it did not have Obsec.

    Necrons Turn 3

    He did not score any points this turn, since he controlled no objectives and was only contesting one. His Spyder was out of range of the Wraiths but it spawned an extra scarab base. The Lychstar moved up, preparing to charge into the Deathrain+Warriors combat. The Wraiths prepared to charge my Fire Warriors. The scarabs moved to protect the backfield and the Spyder continued around the building.
    The warriors from the ghost ark fired at my Heatwave but only managed to inflict one wound. The Immortals regrouped but failed to kill anything. The Night Scythe, failed to damage my Remoras.
    The Warriors charged my Heatwave (Relentless!) The Wraiths charged into my fire warriors, taking a single wound in Overwatch. The Scarabs charged my suit that was contesting his objective and killed him easily. The wraiths killed all my Fire Warriors and consolidated back over the objective. The warriors failed to wound my Heatwave (good armour save rolling on my part) and the Heatwave killed one warrior with a superb kick to the face. The necron stayed down and my Heatwave promptly swept the rest of the squad. Who sucks in close combat now! Yes, I know it's against Necrons; just let me have this one! To top it all off, the Lychguard failed their 5" charge! 

    Tau Turn 3

    I had put my Heatwaves out of position to torch the warriors in the Ark, so I still only controlled one objective which scored me nothing (I may have actually scored 1 point here, or perhaps my sunforge landed off target and I did not hold his home objective. I can't remember). My Cloudbursts failed to come on, but my Y'vahra did. My Riptide Nova charged its thrusters and I used the PEN to grant the Deathrain unit Stubborn. Due to the way Ongoing Reserves is worded, I had to bring the Y'vahra on normally instead of Deep Striking. I used the 24" thrust to get right back into the fight, hopping over the wraiths and going for the backfield objectives. The Heatwaves positioned themselves to contest the objective again. My FBC continued moving around the buildings and my Sunforges all moved in to contest the objective controlled by Immortals and Scarabs. The Remoras dropped into hover mode so that they could get a shot at the Canoptek Spyder.
    The Y'vahra torched the scarabs leaving one base on the table. Fun Fact: since the weapon was instant death to the Scarabs, it did not inflict double wounds, which is why one survived. The Sunforges targeted the Scarabs and killed the last base. The Riptide put a wound on the Spyder and the Remoras put another wound on it, but couldn't quite put it down. One heatwave torched the Wraiths but couldn't wound anything, and the other one ran in order to get closer to my opponent's backfield objective.
    The Deathrain/Warriors combat ended locked. My Sunforges jumped onto his objective. The Heatwave got in range as well. My Riptide thrusted 12" to act as a road block between my monat suits and his wraiths.

    Necrons Turn 4

    His Lychguard prepared to charge again, his Wraiths and Spyder got into position to charge my Riptide (I have no idea why).
    The immortals wounded one of my Sunforges and the Night Scythe caused a penetrating hit on one of my Remoras (again, I am not sure why he didn't target my Heatwave controlling my home objective).
    The Lychguard and necron characters charged into combat and the Lord challenged my Shas'O to mortal combat. My Shas'O powered up his Onager gauntlet and punched him dead on the spot.
    Onager Gauntlet?
    Then everyone else hit. Now that my Shas'O wasn't in a challenge, he took most of the hits and was dropped to his last wound. The combat ended in a draw: 2 wounds each.
    The Wraiths and Spyder charged my Riptide, wounding it twice. I passed my leadership: needed a 7 to pass and I rolled a 6.

    Tau Turn 4

    Finally, my MSU spam was paying off and I scored some points for controlling more objectives than my opponent. I thought that I controlled at least 3 of them, which would get me 3 points this round. Looking back, either I shorted myself on the score (possible, I was running the tourney so I was pretty scatterbrained) or I made a mistake somewhere...Either way, my official score for the round was 3 primary VP's.
    My cloudbursts failed to arrive AGAIN. We were almost out of time so we basically skipped my turn. Scoring was done at the beginning of every turn and I'd already scored all my secondary objectives so it didn't matter now.

    Results

    I had marked his Ghost Ark for death and he had marked my Kroot, so we both scored that secondary. I scored First Blood but if we had been paying attention I would have failed this one. We also both scored Line Breaker.

    I'm making a mistake somewhere in my recollection, because I only remember him scoring a single VP on turn 2, but the final score was 2 VP for him. This is what happens when you forget to bring your phone and take actual pictures!

    Necrons: Marked For Death(Kroot), Linebreaker,  2 primary objectives. 6 VP
    Tau: First Blood, Marked for Death(Ghost Ark), Linebreaker. 3 primary objectives. 9 VP

    Tau Victory! even if you take away First Blood

    Summary

    We were fairly evenly matched throughout the game but he made a bad selection with one of his secondary objectives (one that requires you to kill Every enemy Troop choice). I was controlling the tempo of the objective game, but I had trouble thinking far enough ahead to capitalize on it. I pulled ahead when I controlled 3 objectives, but only in the final turn.
    My overall plan of using small expendable units to tie up his wraiths seemed to work out OK. I got some lucky breaks with the close combats but I also failed every reserve roll for my Cloudbursts so I was playing approximately 150 points short. I am sure that, in the hands of a more experienced and patient player, I would have had a much harder time in this game.
    We ran out of time pretty early in the game, and I was in a good position to score another 3 VP's in the 5th turn, but time is part of the game in a tourney. Oh well.

    Good

    • Monats. They are dirt cheap and did their job of objective-capping wonderfully. Their expendable nature made them straightforward to play and ideal for taking up a disproportionate amount of my opponent's resources. 
    • Support'O. turned my Deathrains into an amazing tarpit unit. Though I probably should have charged him in solo, so that my Deathrains could keep shooting...I forgot to use some of his fun gear (NSJ and VRT)
    • Y'vahra. Performed as expected, putting some hurt on some stuff and proving hard to nail down. He didn't have many ideal targets but he helped turn the left flank and kept the Scarabs busy for a turn. I could have targeted the Spyder with him, but it wasn't contributing to the objective game so I didn't bother. The torrent weapon was incredibly deadly to the Scarabs!

    Bad

    • Cloudbursts. Victim's of the reserve gods. It's only natural when you use tons of reserves that some will end up left behind. I would rather have had them than one of the Sunforges though...
    • Marker Drones. Partly my own fault, but I never really got to use their marker hits for anything.

    Neutral...

    • Riptide. Decent attracting attention and putting out some AP2 firepower. otherwise just shuffled around and looked awkward. A good solid base for the army, but nothing spectacular when you are facing so many 3+ invulnerable saves followed by 4+ RP saves.

    Lessons Learned

    My stalling tactics worked, but only thanks to some bad luck and tactical errors on his part. I also failed to capitalize on my advantages for the majority of the game. Since most of my units were Obsec and none of his were, I had a distinct advantage over him. However, I kept forgetting that scoring happens at the Beginning of my turn and I put myself out of position a couple times, failing to anticipate that certain of my units would be dead by the time it came around to my turn.

    The mission was new to me, but had I done a better job of keeping Obsec units near objectives I could easily have scored another 2 points even with only 3 rounds to score in. I also could have done a better job denying him objectives.

    Necrons are tough. I knew that going in and purposefully avoided targeting the big units with invulnerable saves. I was grateful for the close combat capabilities of my army, as close combat was the only area I could make some headway against the Necrons.

    I was pleased with the game, as I had managed a win against a very powerful codex, and it was my first game against the new codex too!

    Thanks for reading! I hope you enjoyed it. 

    1850 Tournament Results: Round 2 vs Space Marines

    $
    0
    0
    ---Alarm sirens blared across the compound. Shas'O Sha'is'Nen proceeded with his retinue through the trenches and between bunkers, approaching his goal. He could now see the mysterious contraption nestled in the center of the trench network. Across the compound bulky figures appeared: Gue'la "Space Marines." They had apparently been expecting his cadre's move to steal the xeno-tech while the garrison was called away to deal with his own feint maneuver. Their hulking appearance was always something of a surprise when considering they possessed a modest intelligence.

    "Vre'Mon'yan, occupy the Gue but be mindful of your situation. Leave the battlefield when your limit is reached.
    All units, disperse and engage the Gue at your own discretion. I will retrieve the artefact.---


    This is the battle report for Round 2 of our local tournament: "The Quickening." This match was against a rough combination of Space Marine net list components. I had seen the list beforehand and I knew this one was going to be tough.


    The Armies

    Space Marines (Iron Hands + Ultramarines)

    • Combined Arms Detachment (Iron Hands)
      • Chapter Master w/ bike, hammer, fist, artificer armour, shield eternal, digital weapons, master crafted weapons
      • Level 2 Librarian
      • Command Squad on bike: Apothecary, one fist, and some power mauls
      • 1x3 Devastator Centurions with Grav
      • 2 Thunder Fire Cannons
      • 5 sniper scouts + Land Speeder Storm
      • 5 sniper scouts + Land Speeder Storm
      • Vengeance Weapons Battery (Quad Lascannons)
    • Allied Detachment (Ultramarines)
      • Tigerius
      • 5 scouts + Land Speeder Storm
    The list was originally intended to have 4 centurions but he didn't get the 4th bought in time. It was a simple list to play with tough backfield components, two heavy hitting sledgehammers that could move, and a multitude of annoying Obsec units for capping objectives.

    Tau (Farsight Enclaves+Tau Empire)

    I've outlined my army's composition HERE. It is reminiscent of my usual list, but since Forgeworld was allowed I took advantage and fielded some of my seldom-used toys.

    The Scenario

    Mission: modified NOVA mission. 4 objectives, one in each table quarter and a Relic in the center. He chose the "score as you go" option and I chose the "score at game's end" option. .
    We also secretly selected our secondary objectives. I chose 1st Blood, Linebreaker, and marked one of his Land Speeder Storms for death. He chose Linebreaker, marked my Riptide for death, and Slay the Warlord. Each secondary was worth 2 points.
    Deployment: Hammer and Anvil
    Night Fight: No
    First Turn: Tau 
    Warlord Traits: My warlord was the Cityfighter from the Strategic Traits, and his Chapter Master got something that I don't remember mattering.
    Psychic Powers:He got everything he could ever wish for. He got Invisibility, Gate of Infinity, Vortex of Doom, and a couple other powers that I don't remember.

    Disclaimer: The diagrams may not always match up exactly with the pictures. Things get forgotten or moved around in the mind. Just take it in stride and keep reading. It is also difficult to show both the regular movement and the "thrust" movement for jetpacks and jetbikes. That is why you will sometimes see units moving out of turn.

    Deployment

    I won the roll-off, but in hindsight I really did choose the wrong side. I gave him the side that had fewer terrain pieces but those pieces were much better at blocking line of sight and were perfect hiding places for his Centurions and Thunderfire Cannons. He put the Vengeance Weapons Battery (VWB) next to one objective as an extra LOS blocker for his Thunderfire Cannon.
    I put my Riptide and Deathrains in the center on the front line. The firewarriors on one objective and my marker unit on the other. The Y'vahra I put a little ways back.
    He put a Thunderfire Cannon on each objective, out of sight. The Centurions+Librarians also deployed out of sight in the larger building. His bike unit deployed front and center.
    I won the roll-off for infiltrators and put my Kroot as near the Relic as possible. He put two squads of scouts on either side of the board, as close as they could to my units.
    Mercifully, he failed to seize the initiative.

    Tau Turn 1

    I nova-charged the Riptide and Y'vahra's shields, anticipating devastating Grav firepower. I moved up my Deathrains, markers, Kroot, and Riptide. I decided to use the Y'vahra as an early distraction and moved him the full 24" as close to the enemy scouts as I could.
    I used the marker drones, Kroot, and Deathrains to wipe out one Scout Squad, getting 1st Blood. My Riptide, dropped a large Ion blast on the bikes, but (as expected) caused no wounds. The Y'vahra used its flamer to just barely catch one scout and the Chapter Master under the template. Two scouts were roasted and the Chapter Master lost a wound. The scouts' morale held.
    I jumped my Riptide back a bit, shielding the Deathrains from the coming Grav in my backfield. The Y'vahra jumped right into combat with the Scouts. The scouts caused no wounds and the Y'vahra failed to kill any as well. 

    Space Marine Turn 1

    He moved his bikes into position and had nothing else to move.
    He cast Gate of Infinity on his centurion unit, but failed to cast Invisibility (periled as well). They landed smack on target behind my lines.
    His Thunderfire Cannons targeted my Firewarriors and Kroot. I lost 7 Kroot and 1 Firewarrior. The Kroot passed their morale check. The Centurions split their fire between the Riptide and the Marker Drone unit. He killed a drone and wounded my Warlord twice. The Riptide took 3 wounds from the other Grav cannons.
    The bikes charged into combat with my Y'vahra. The combat was brutal but my Y'vahra only took 1 wound and killed two scouts in return (leaving only the sergeant). The space marines passed their leadership, but I made it into a big deal that my Tau had won the combat :D

    Tau Turn 2

    My two Heatwaves, two Sunforges, and my Remoras arrived from reserve. One of the Sunforges had a mishap and was placed way back in my own table corner. The other suits landed in his backfield while my Remoras came on ready to shoot up the Centurions in my own backfield. My Riptide Nova charged it's secondary weapon to fire twice, the Y'vahra Nova charged its shield. I could have escaped combat but I decided it would be better to hold him up to give me time to deal with the Centurionstar. The Vengeance Weapons Battery stripped a hull point and stunned one of my Remoras.
    The sunforge that landed on target killed the VWB with a single shot, causing a total collapse. The heatwaves had both landed too far away to hit anything. The marker drones lit up the Centurionstar, landing a good few hits, which my Riptide promptly used to nuke the unit. He killed off two Centurions and wounded the level 2 psyker. My Deathrains and Remoras finished off the last Centurion and wounded Tigerius and the other Librarian. Both psykers were now on their last wound.
    The Y'vahra squashed the last scout in combat, and took another wound. My other suits all jumped closer to their targets (I forgot to move the Sunforge in the corner) and onto objectives. I charged my Riptide straight into combat with the two psykers. He failed to finish off either of the psykers, and took no wounds in return.

    Space Marine Turn 2

    Two of his Land Speeder Storms arrived from Reserves, but the one that he had chosen to Deep Strike (the one I'd marked for death and was carrying his other scouts) had a mishap and went back into Reserves. The speeder that Outflanked came straight onto one of my home objectives, contesting it.
    He had nothing worth moving.
    He cast Force for his two psykers but I was able to deny Invisibility this turn with a lucky pair of 6's! In addition, he periled and Tigerius forgot Vortex of Doom.

    The Thunderfire Cannons shot at my Firewarriors, one missing badly and the other only killing one. The newly arrived speeder fired at them too and had better luck, killing two. The Fire Warriors failed their morale check and fell back, giving up that objective to the Land Speeder Storm.
    In close combat, the Psykers killed off the Riptide with a single Instant Death wound. The Y'vahra inflicted no wounds and took a single wound in return (now on its last wound). I passed my leadership check then I tested for Hit-And-Run but failed the initiative test.


    Tau Turn 3

    One of my Sunforges arrived from reserve, but the  Cloudbursts and other Sunforge did not. I put him on the Relic but he scattered wide. I chose not to try to Nova Charge my Y'vahra, in order to avoid him dying to the Nova wound. 4+ invulnerable was still good so if I was lucky I would take no wounds again.
    My Fire Warriors rallied but were too far away to contest or shoot much.My warlord moved away from the marker drones, I was hoping to get him to my Deathrain team so that when I got caught in combat with some people I could challenge his Chapter Master with my Shas'O'Mortal and allow my FBC free reign to kill the rest of the squad (this was actually an error, since two of the marker drones should have come with him, but I forgot they weren't all one unit).The marker drones moved to block the psykers from the objective they were approaching. I dropped the Remoras into skimmer mode in order to keep the Librarians in their firing arc.
    The new Sunforge didn't have range on anything this turn. The marker drones landed a couple hits. The Remoras used the hits to shoot up the Librarians, but only killed Tigerius. The Deathrains fired at the Land Speeder, killing it easily. The Sunforge nearest his objective fired and wounded the Thunderfire Cannon. The two Heatwaves failed to wound the other. I forgot to fire at the librarian with my FBC.
    This shows that my Cloudbursts actually came in this turn, but I know for a fact they did nothing. I apologize for the confusion.

    The Y'vahra finally got killed in close combat. The Heatwaves and Sunforge both charged the Techmarines (what was I thinking?) and were all promptly killed by their power fists. I hopped my lone Sunforge onto the objective next to the wrecked Land Speeder Storm. The Sunforge in the enemy deployment zone used its thrust move to get onto the relic.

    Space Marine Turn 3

    Things had swung his way over the last turn, and almost entirely due to my own mistakes. His other reserves also arrived, making my situation pretty dire. One speeder came on to cap the objective my Marker Drones were screening, and the one that was Deep Striking landed near my Remoras.
    The Scouts hopped out of the Deep Striking Land Speeder Storm. The librarian regained one of his wounds (It Will Not Die from Iron Hands chapter tactics) and moved toward my Marker Drones. The chapter master and his unit sped around my Kroot and went straight for my Deathrain unit.
    The speeders themselves didn't actually kill anything this turn. The Thunderfire Cannons targeted my Sunforge but couldn't wound it. One of them scattered very wide, hitting my poor Fire Warriors, killing one and forcing the last member to flee off the table. The Scouts targeted my FBC, killing him with some poor rolling on my part. The Chapter Master dropped the Orbital Bombardment on my Deathrains, killing two of them, but my Shas'O passed his invulnerable save (thank goodness!). The bikes' other weapons had no effect on my Shas'O.
    The Librarian charged my drones, killing and sweeping them with ease. The bike unit charged my Shas'O. My Shas'O took two wounds, but passed everything else. He opted for the S10 AP1 single attack but missed and lost the combat. He passed his leadership check though.
    Foolish Shas'O. You should have known you would fail your first 4 saving throws!

    Tau Turn 4

    The last of my reserves finally arrived. I dropped one Sunforge near the speeder capping my objective, scattering a fair bit due to the jammer on the speeder. The Cloudbursts landed in his backfield.
    I moved the Sunforge with the Relic a bit deeper into enemy territory.  My Sunforge turned away from capping an Objective to help kill the Deep Striking Speeder.

    The new Sunforge failed to get any hits past the speeder's jink save. My Remoras and other Sunforge had better luck, exploding the Speeder that had landed near them. The Cloudbursts tried killing the wounded Thunderfire cannon but couldn't land enough wounds to force a failed save.
    In close combat my Shas'O took no wounds but missed with his Onager gauntlet again. My Cloudbursts used their thrust move to get within 3" of the enemy objective and control it.
    Thunderhammers, Power Fists, Lightning Claws? Puh-leeez.


    Space Marine Turn 4

    The Scouts moved to engage my Remoras, and the Librarian moved onto the objective.
    He cast Psychic Shriek on my Sunforge, killing it just barely.
    OneThunderfire Cannon targeted the Sunforge carrying the relic. It caused several wounds and killed him. The Other Thunderfire Cannon shot at my Cloudbursts, killing a few drones and forcing a morale check. The unit failed the check and fell back.
    The scouts charged my Remoras, losing their Sergeant to an Overwatch shot from my nearby Sunforge. They destroyed one Remora and damaged the other. The bikers and chaptermaster failed to kill my Shas'O, but succeeded in wounding him one more time. I missed again with the Onager Gauntlet, but passed my Hit-And-Run check. I left combat, putting the Kroot between him and I.

    Tau Turn 5

    We were almost out of time, so we had to make our turns quick. We split the remaining time evenly between us.
    My Cloudbursts thankfully rallied and moved back towards the objective. I moved the Remora towards the Librarian and the Speeder. My Sunforge jumped toward my home objective. My Shas'O jumped to pick up the dropped Relic, but kept his Deathrain companion within range of the last Land Speeder Storm. The Kroot tried to screen the bikers, but with only 3 members it wasn't much help.
    The Sunforge wounded two scouts, but they made both of their 6+ cover saves! My Deathrain, with help from the Shas'O, was able to kill off the Land Speeder Storm. The Remora landed quite a few hits and finished off the Librarian. My Cloudbursts failed, yet again to kill the Thunderfire Cannon.
    I used thrust moves to put a tad more distance between him and I. I could have put more distance, but I was still under the impression that the Techmarines were an assault threat so I was trying to keep my distance from them as well.

    Space Marine Turn 5

    His bikes moved around my Kroot, the Scouts moved toward my lone Sunforge.
    His scouts tried to shoot my Sunforge off the objective but I only failed one wound. The bikers tried to kill off my Shas'O but couldn't get through his defenses. One Thunderfire Cannons also tried to kill my Shas'O but couldn't crack his 2+ armour. The other fired at my Cloudbursts, wounding a battlesuit but unable to get them off the objective.
    The bikers attempted to charge my Shas'O but lost the nearest biker (not the Chapter Master) to Overwatch fire and failed the charge as well. Time was called before he could attempt to charge my Sunforge with the Scouts.

    Results

    The game felt a tad cheap since he'd run out of time, but we had been fair and divvied up the last 20 minutes evenly (10 minutes each). Those Thunderfire Cannons just take forever to fire!

    He had done a good job of scoring points throughout the game, but I had also done a decent job of keeping those scores to a minimum. Even with my bone-headed mistakes, I'd put enough pressure on him to slow down his scoring. At the end of the game I held my home objective, one of my opponent's objectives, and the Relic.

    Tau: First Blood, Marked For Death(speeder), Linebreaker,  8 primary objectives. 14 VP
    Space Marines: Slay the Warlord, Marked for Death(Riptide), Linebreaker. 6 primary objectives.  12 VP

    Tau Victory! 

    Summary

    So many stupid mistakes...
    A very close game, that nearly got away from me there when I had a couple turns of complete stupidity. Had I kept my distance and forced Him to charge Me most of the time, I could have denied him more points and had more units for him to deal with. Instead I obligingly gave him my Riptide and a few of my precious battlesuits as close combat gifts during MY turn.
    Luckily, since he failed to cast Invisibility twice, I wasn't completely blown out of the water. He also made some errors in target priority, allowing my Riptide to survive for the counter-attack.

    Good

    • Monats. Though I foolishly threw 3 of them away, the other 3 all did their duty well. Especially the one that seemed to have a knack for shooting Scouts in Overwatch! 
    • Support'O. He again proved an excellent tarpit, and his 50/50 chance of leaving combat was pretty handy this game. The Onager Gauntlet never connected, but it wouldn't have been inflicting instant death anyways. I love him.
    • Remoras. They didn't rack up a huge kill score, but they were decent at cleaning up stragglers in my deployment zone. The Cloudbursts were supposed to be used in a similar capacity, but unfortunately had to be elsewhere.

    Bad

    • Cloudbursts. They arrived so late that I couldn't use them against the scouts or speeders, which would have been their target of choice. Instead, they caused no damage to a Thunderfire Cannon, and nearly cost me the game when they fled the objective for a turn.
    • Kroot. They killed almost nothing and died to the Thunderfire Cannons early. Even though they survive the whole game, the survivors were unable to contribute in any meaningful way.
    • Fusion Blade Commander. Aside from making my opponent second-guess casting offensive powers before he died, he granted me only BS5 for the marker drones until he got caught in the open. He was forced to take exactly 4 saves the entire game and failed them all (3+). He never got into combat either.

    Neutral...

    • Riptide. He was handy against the Centurionstar, and I am sure he would have been handier still if I'd kept him away from the psykers. Sadly, my own stupidity bought him an early death and a lack-lustre game.
    • Y'vahra. I got to use the turn 1 assault, which was fun, and he held up the bikers for longer than I expected him to. Even though he died on my opponent's turn, he performed well and acted as an admirable road block until I'd dealt with the Centurions. He didn't kill much though, only wiping out the one scout squad.

    Lessons Learned

    Even if you are willing to get into close combat, know when to make Him come to You. For instance, I did not even know that Artillery units could not charge if they had any guns left! I could have left my suits on each objective until he killed them with shooting! Instead, I ran them in and got them killed by power fists. How dumb can you be? Even if they COULD charge I should have forced him to come to me instead of serving my suits to him on a silver platter...This cost me many points as I likely could have controlled an extra point at game's end and denied him a few points over the course of the game.

    I should probably have abandoned the objective held my my marker unit earlier as well. I should have known that his reserves were all Obsec so keeping my unit there was pointless. They should have stuck together and kept my FBC from getting caught in the open (which was actually a mistake on my part, since two of the drones should have accompanied him and I hadn't differentiated them for shooting purposes)

    My opponent made many mistakes, especially with splitting his fire between targets and failing to kill either. This could just be a difference in Space Marine battle philosophy, since Tau focus fire whenever possible. He also did not challenge my Shas'O which would have left my Deathrain wide open to the rest of his unit and ultimately cost him 2 points since it was my Deathrain that killed the speeder I'd Marked for Death. 

    Thunderfire Cannons are tough and annoying. The chapter master on bike was annoying as well. My opponent learned that perhaps Tau aren't quite the pushover in close combat that he expected them to be. Had I been savvier, I bet he would have been downright afraid of combat with my Tau! It makes me excited for a rematch!

    Thanks for reading! I hope you enjoyed it. 
    Viewing all 125 articles
    Browse latest View live